
章 21. 虛擬化
This translation may be out of date. To help with the translations please access the FreeBSD translations instance.
目錄
21.1. 概述
虛擬化軟體可以讓同一台機器得以同時執行多種作業系統。在 PC 上的這類軟體系統通常涉及的角色有執行虛擬化軟體的主端 (Host) 作業系統以及數個安裝在其中的客端 (Guest) 作業系統。
讀完這章,您將了解:
主端作業系統及客端作業系統的差別。
如何在 Intel™-based Apple™Mac™ 電腦安裝 FreeBSD 。
如何在 Microsoft™ Windows™ 使用 Virtual PC 安裝 FreeBSD。
如何以 FreeBSD 作為客端安裝在 bhyve。
如何調校 FreeBSD 系統來取得虛擬化的最佳效能。
在開始閱讀這章之前,您需要:
知道如何安裝 FreeBSD。
知道如何設定網路連線。
知道如何安裝其他第三方軟體。
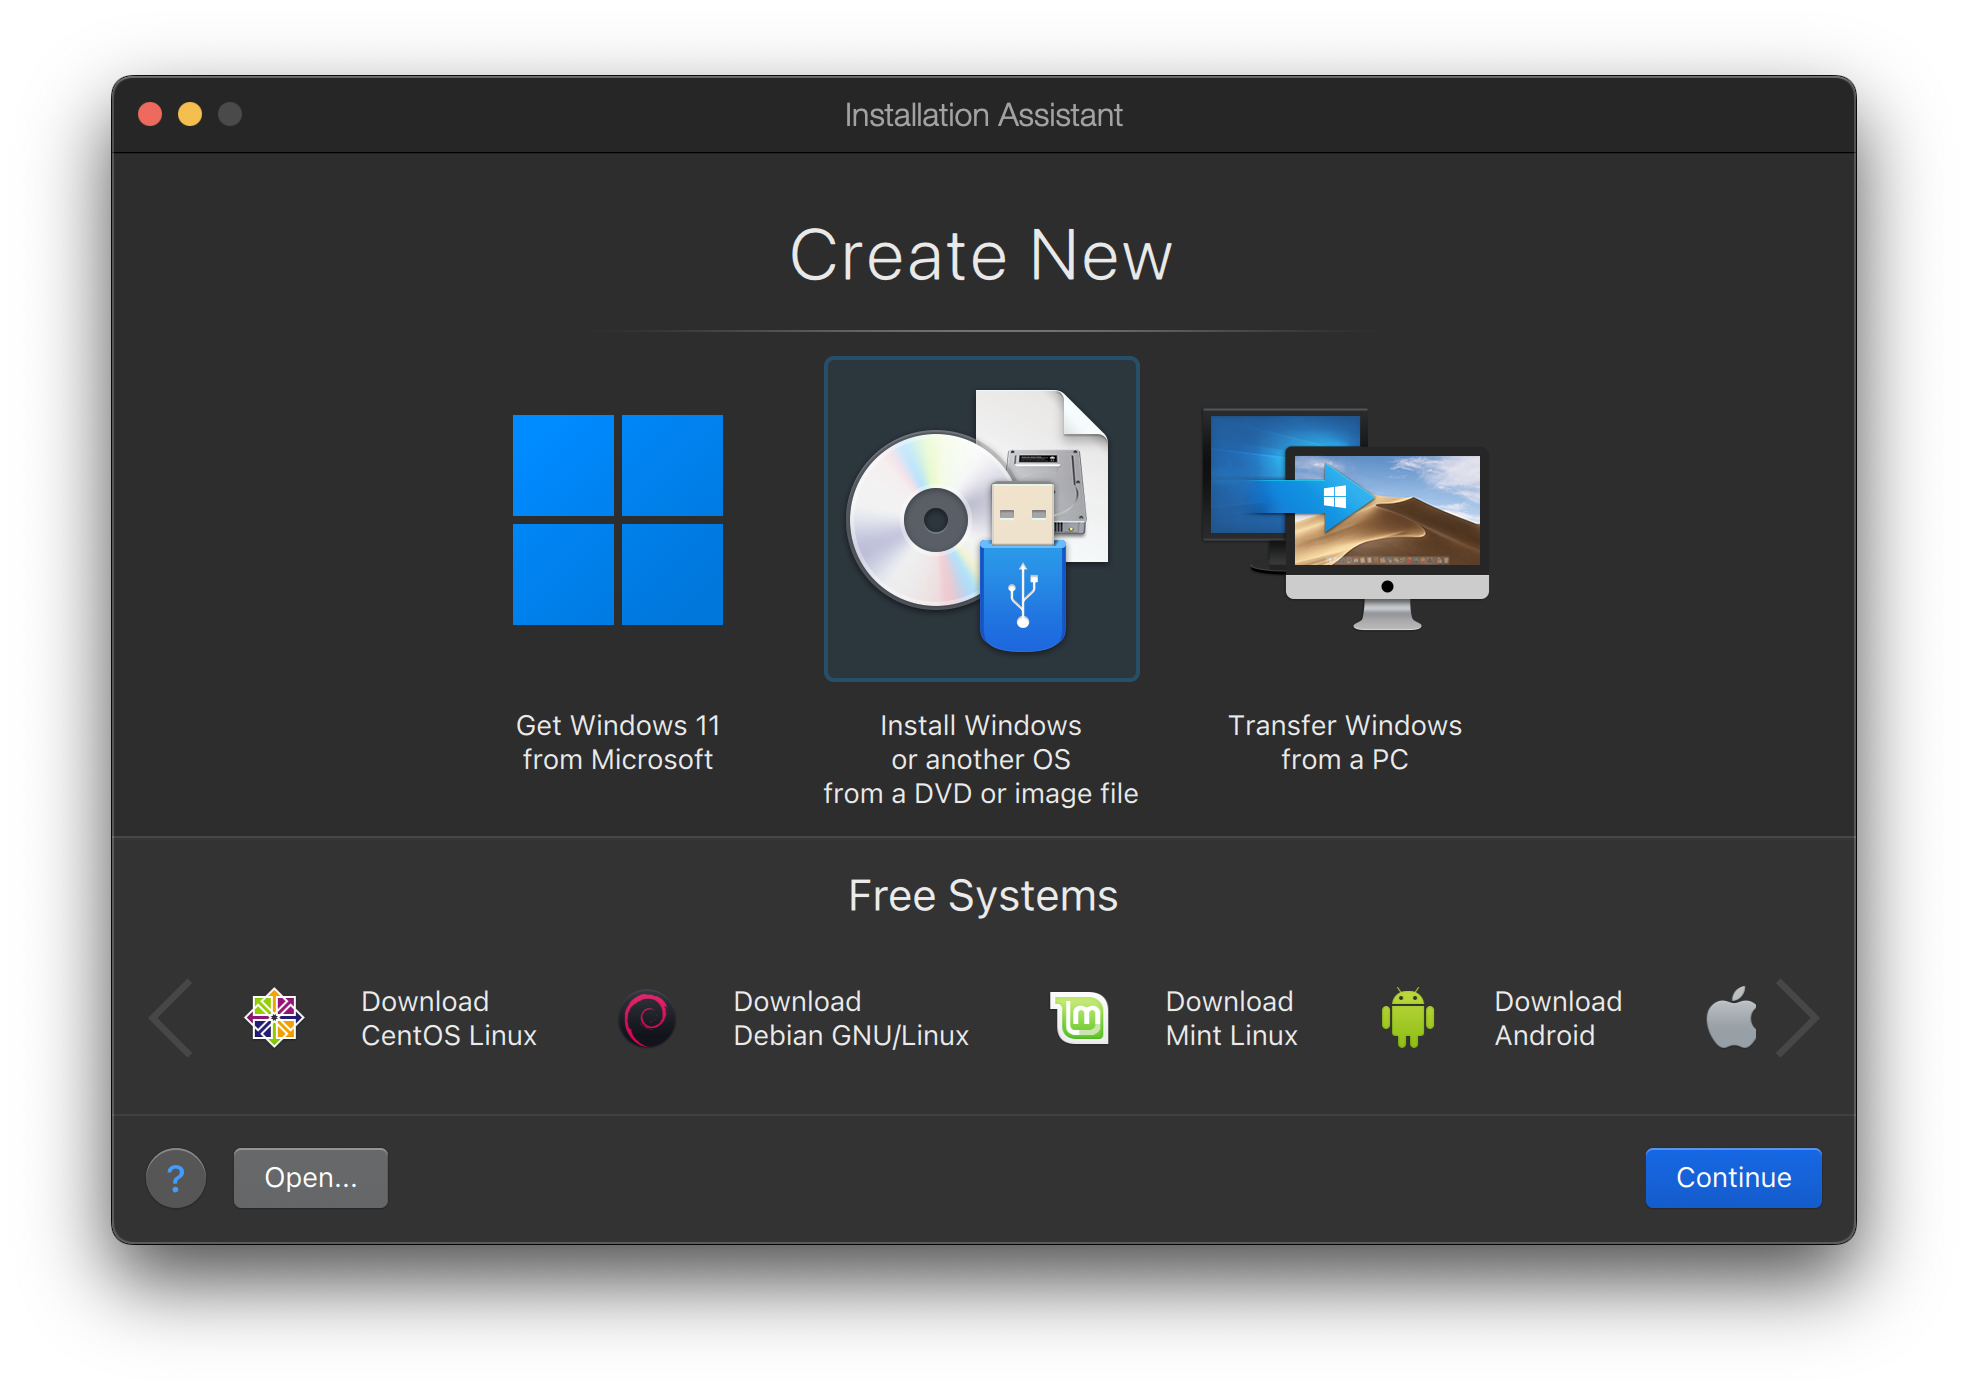
21.2. 在 Mac OS™ X 的 Parallels 安裝 FreeBSD 為客端
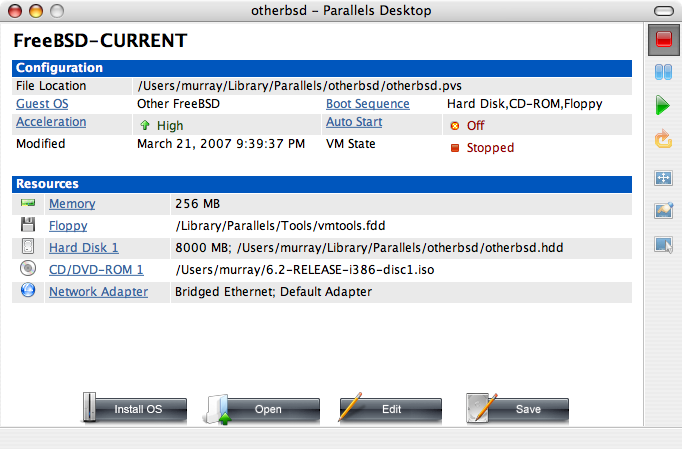
Mac™ 的 Parallels Desktop 是一套商業軟體可在 Intel™ 為基礎的 Apple™Mac™ 的 Mac OS™ 10.4.6 或更新版本上執行。 該軟體完全支援使用 FreeBSD 作為客端作業系統。 在 Mac OS™ X 裝好 Parallels 後,使用者必先完成虛擬機器的設定後才可安裝想使用的客端作業系統。
21.2.1. 在 Parallels/Mac OS™ X 安裝 FreeBSD
在 Parallels 上安裝 FreeBSD 的第一步是建立供安裝 FreeBSD 使用的新虛擬機器。提示出現後請選擇 Guest OS Type 為 :
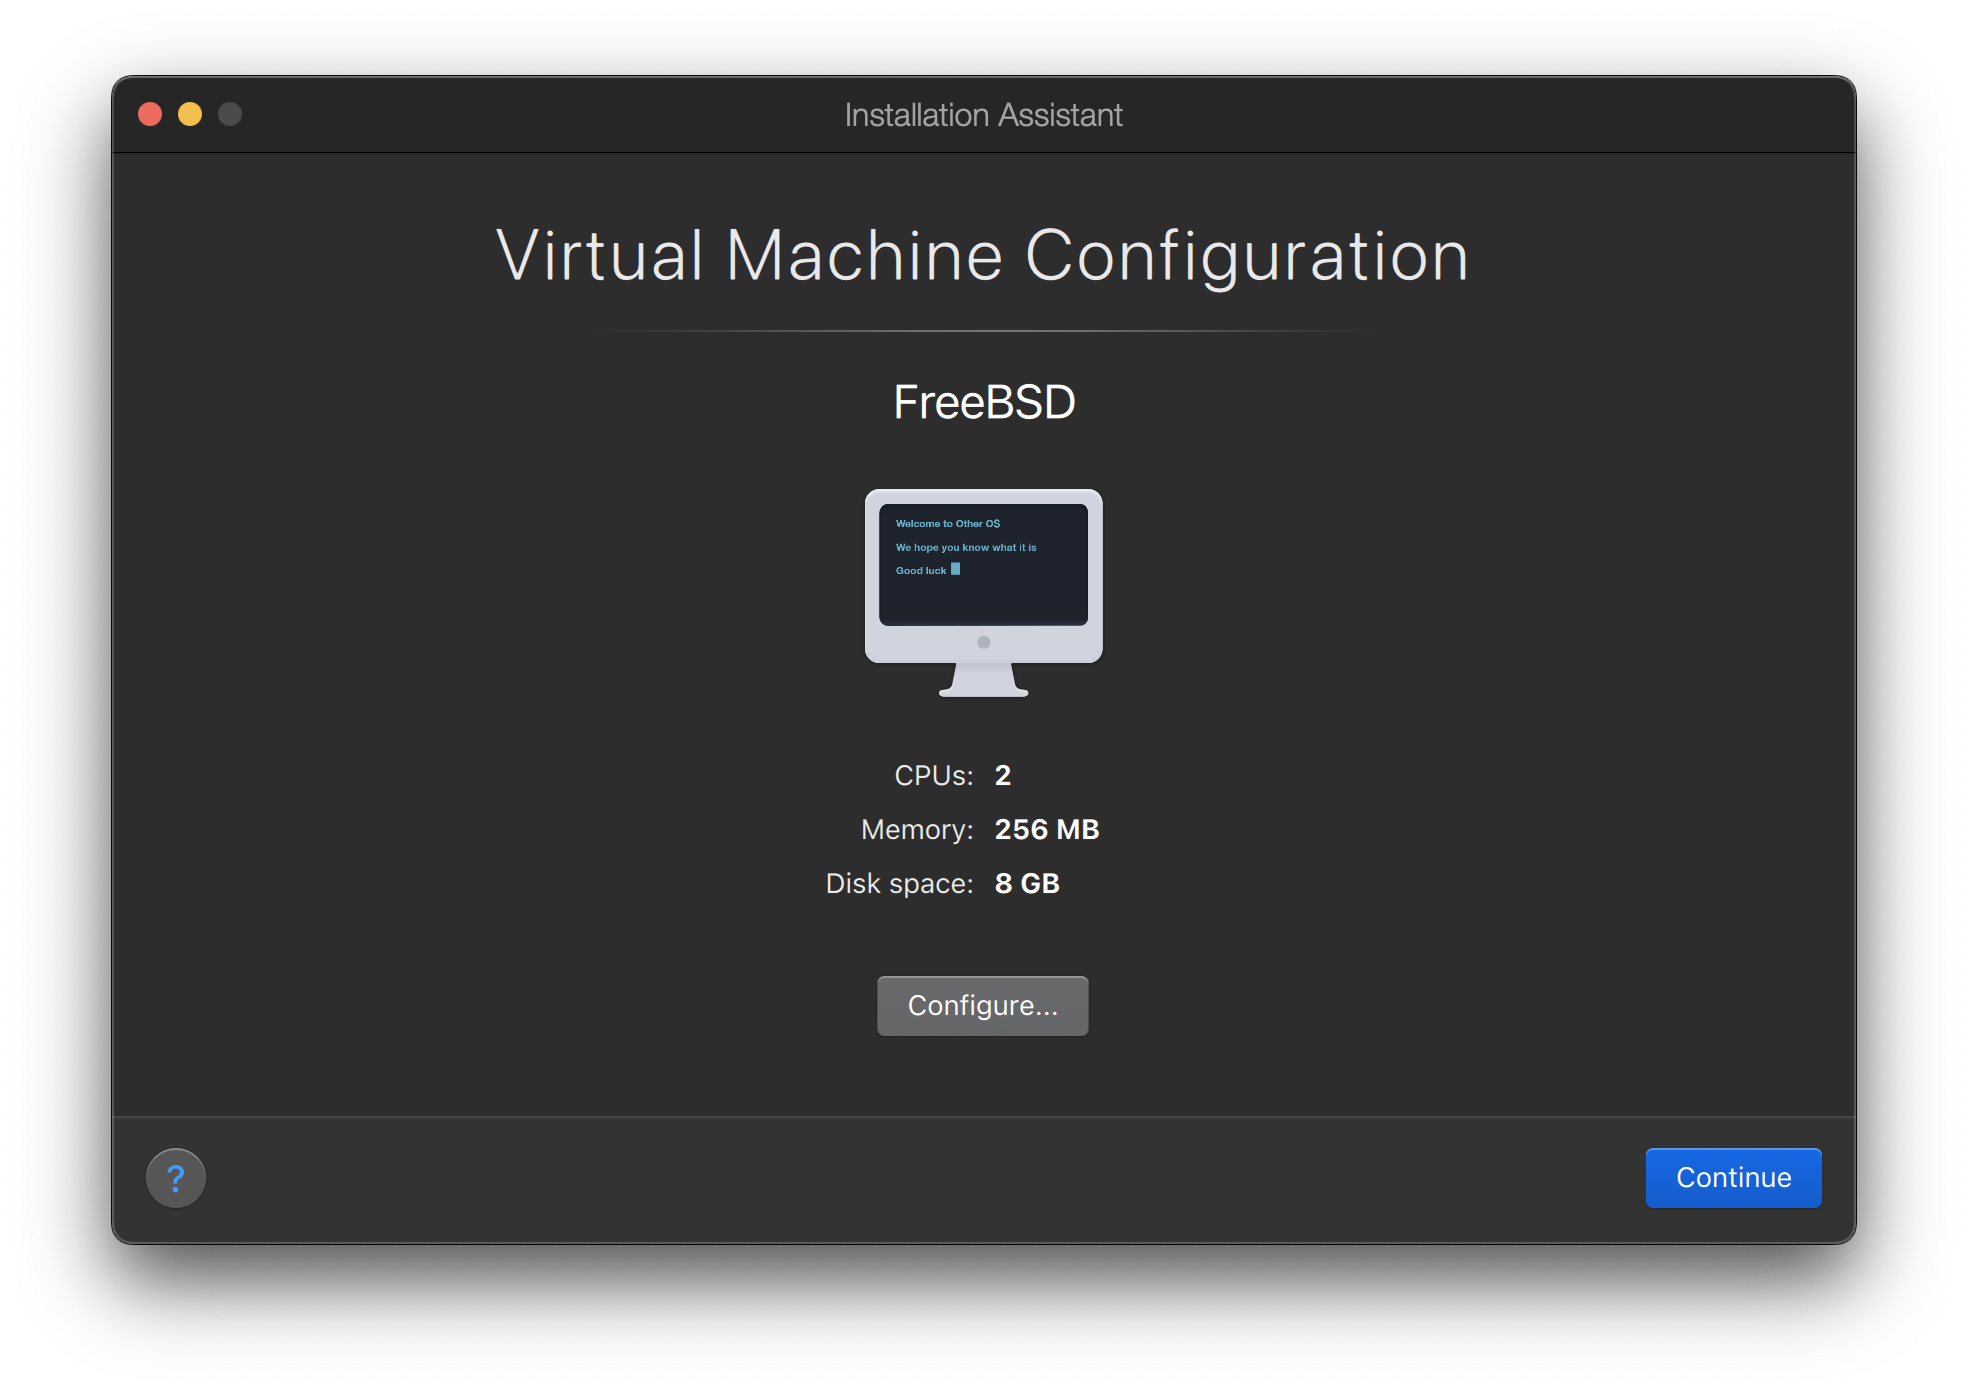
根據您對此虛擬 FreeBSD 作業系統的規畫選擇合理的磁碟及記憶體空間,對大多數在 Parallels 下的 FreeBSD 使用來講 4GB 的磁碟空間與 512MB 的 RAM 便足夠:
選擇網路類型以及網路介面:
儲存並完成設定:

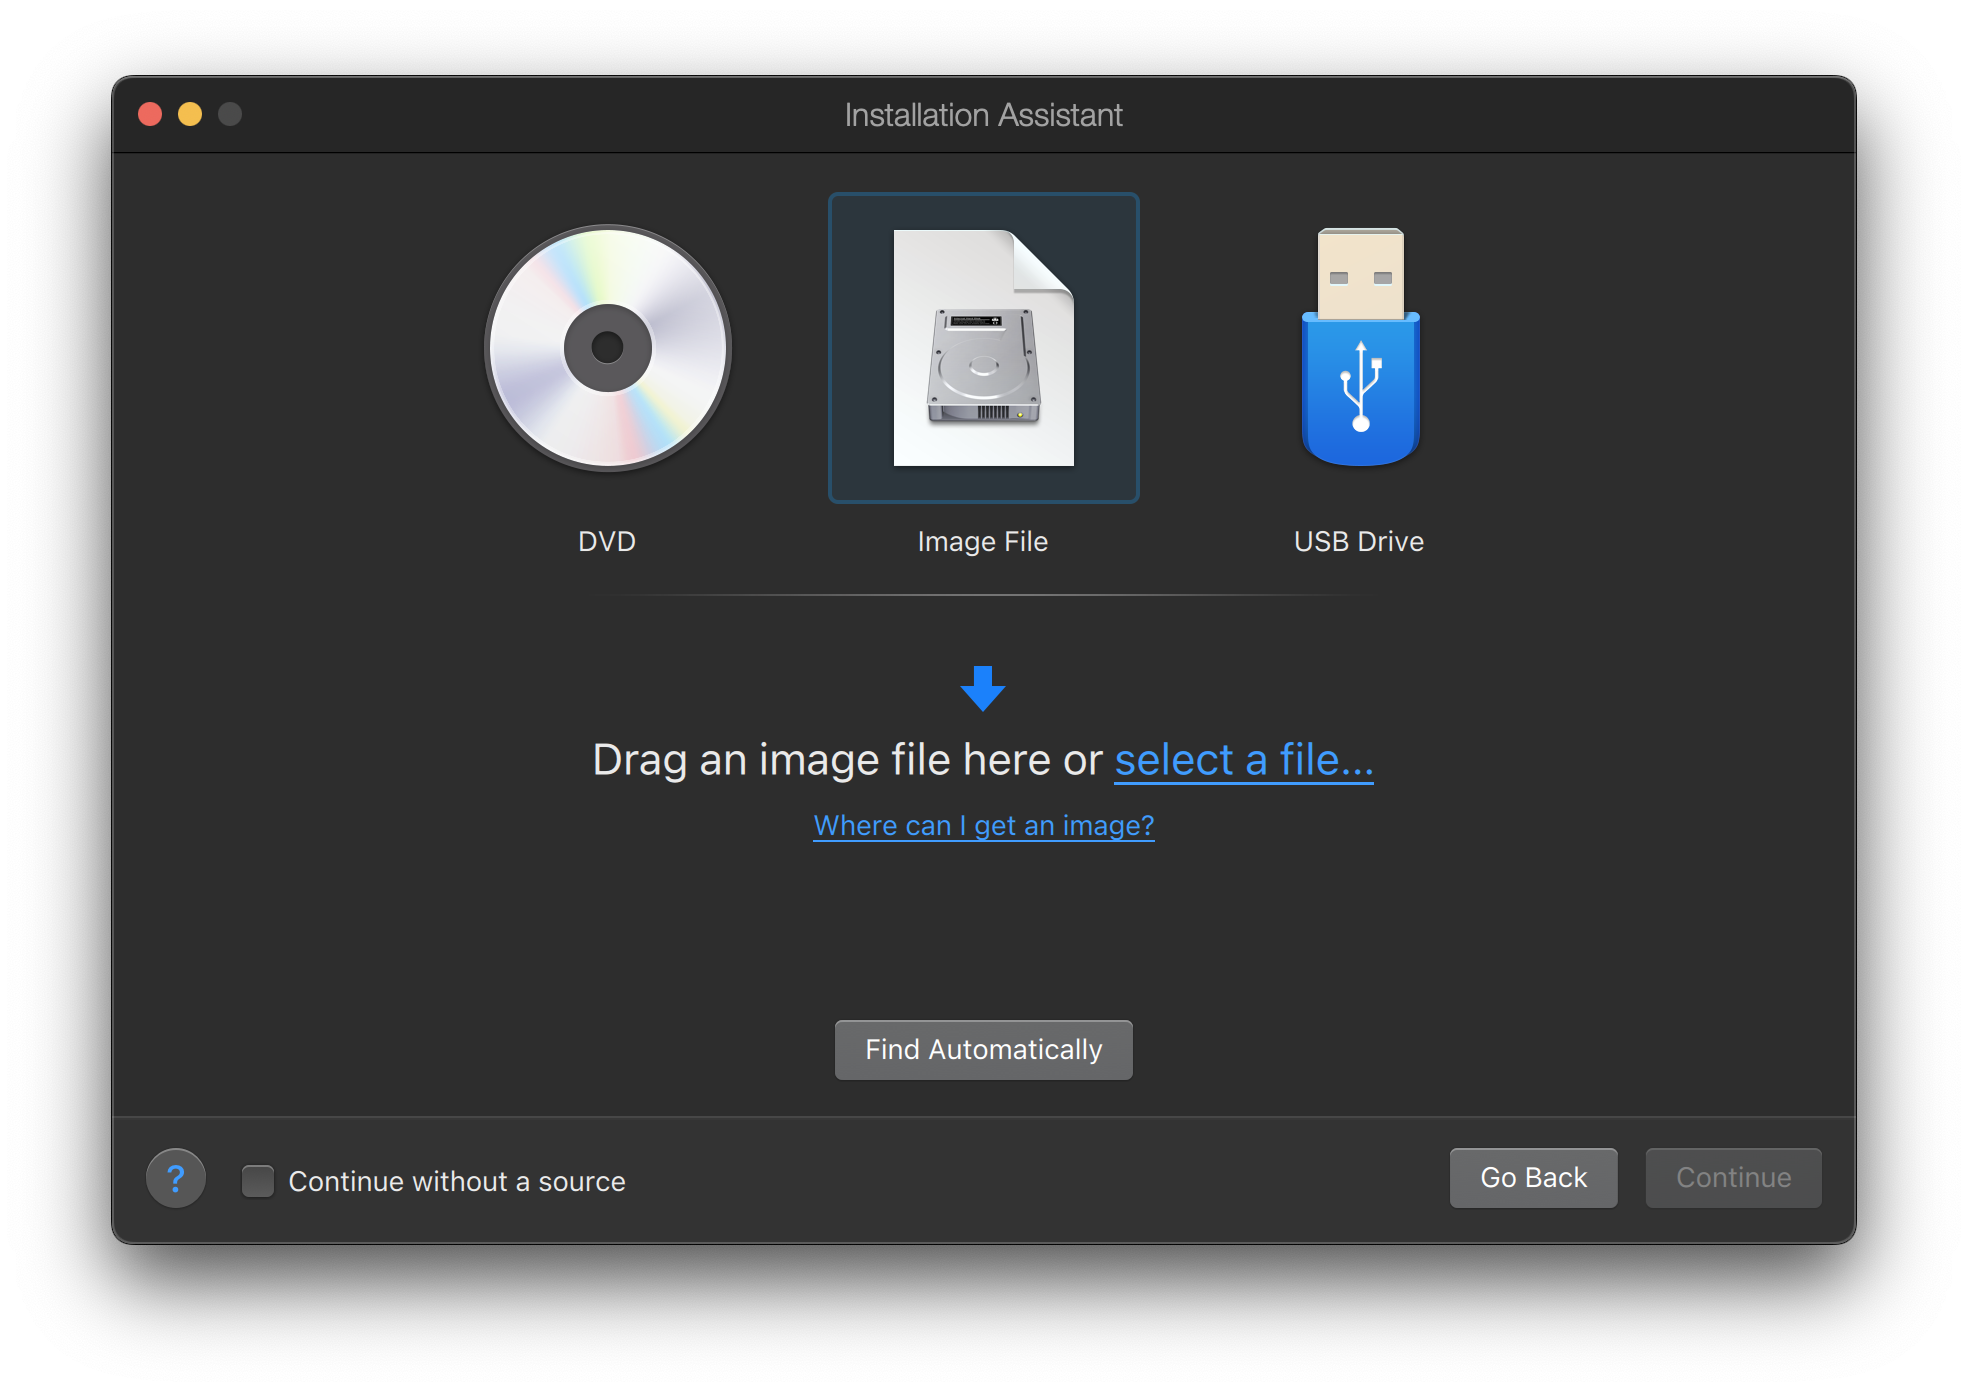
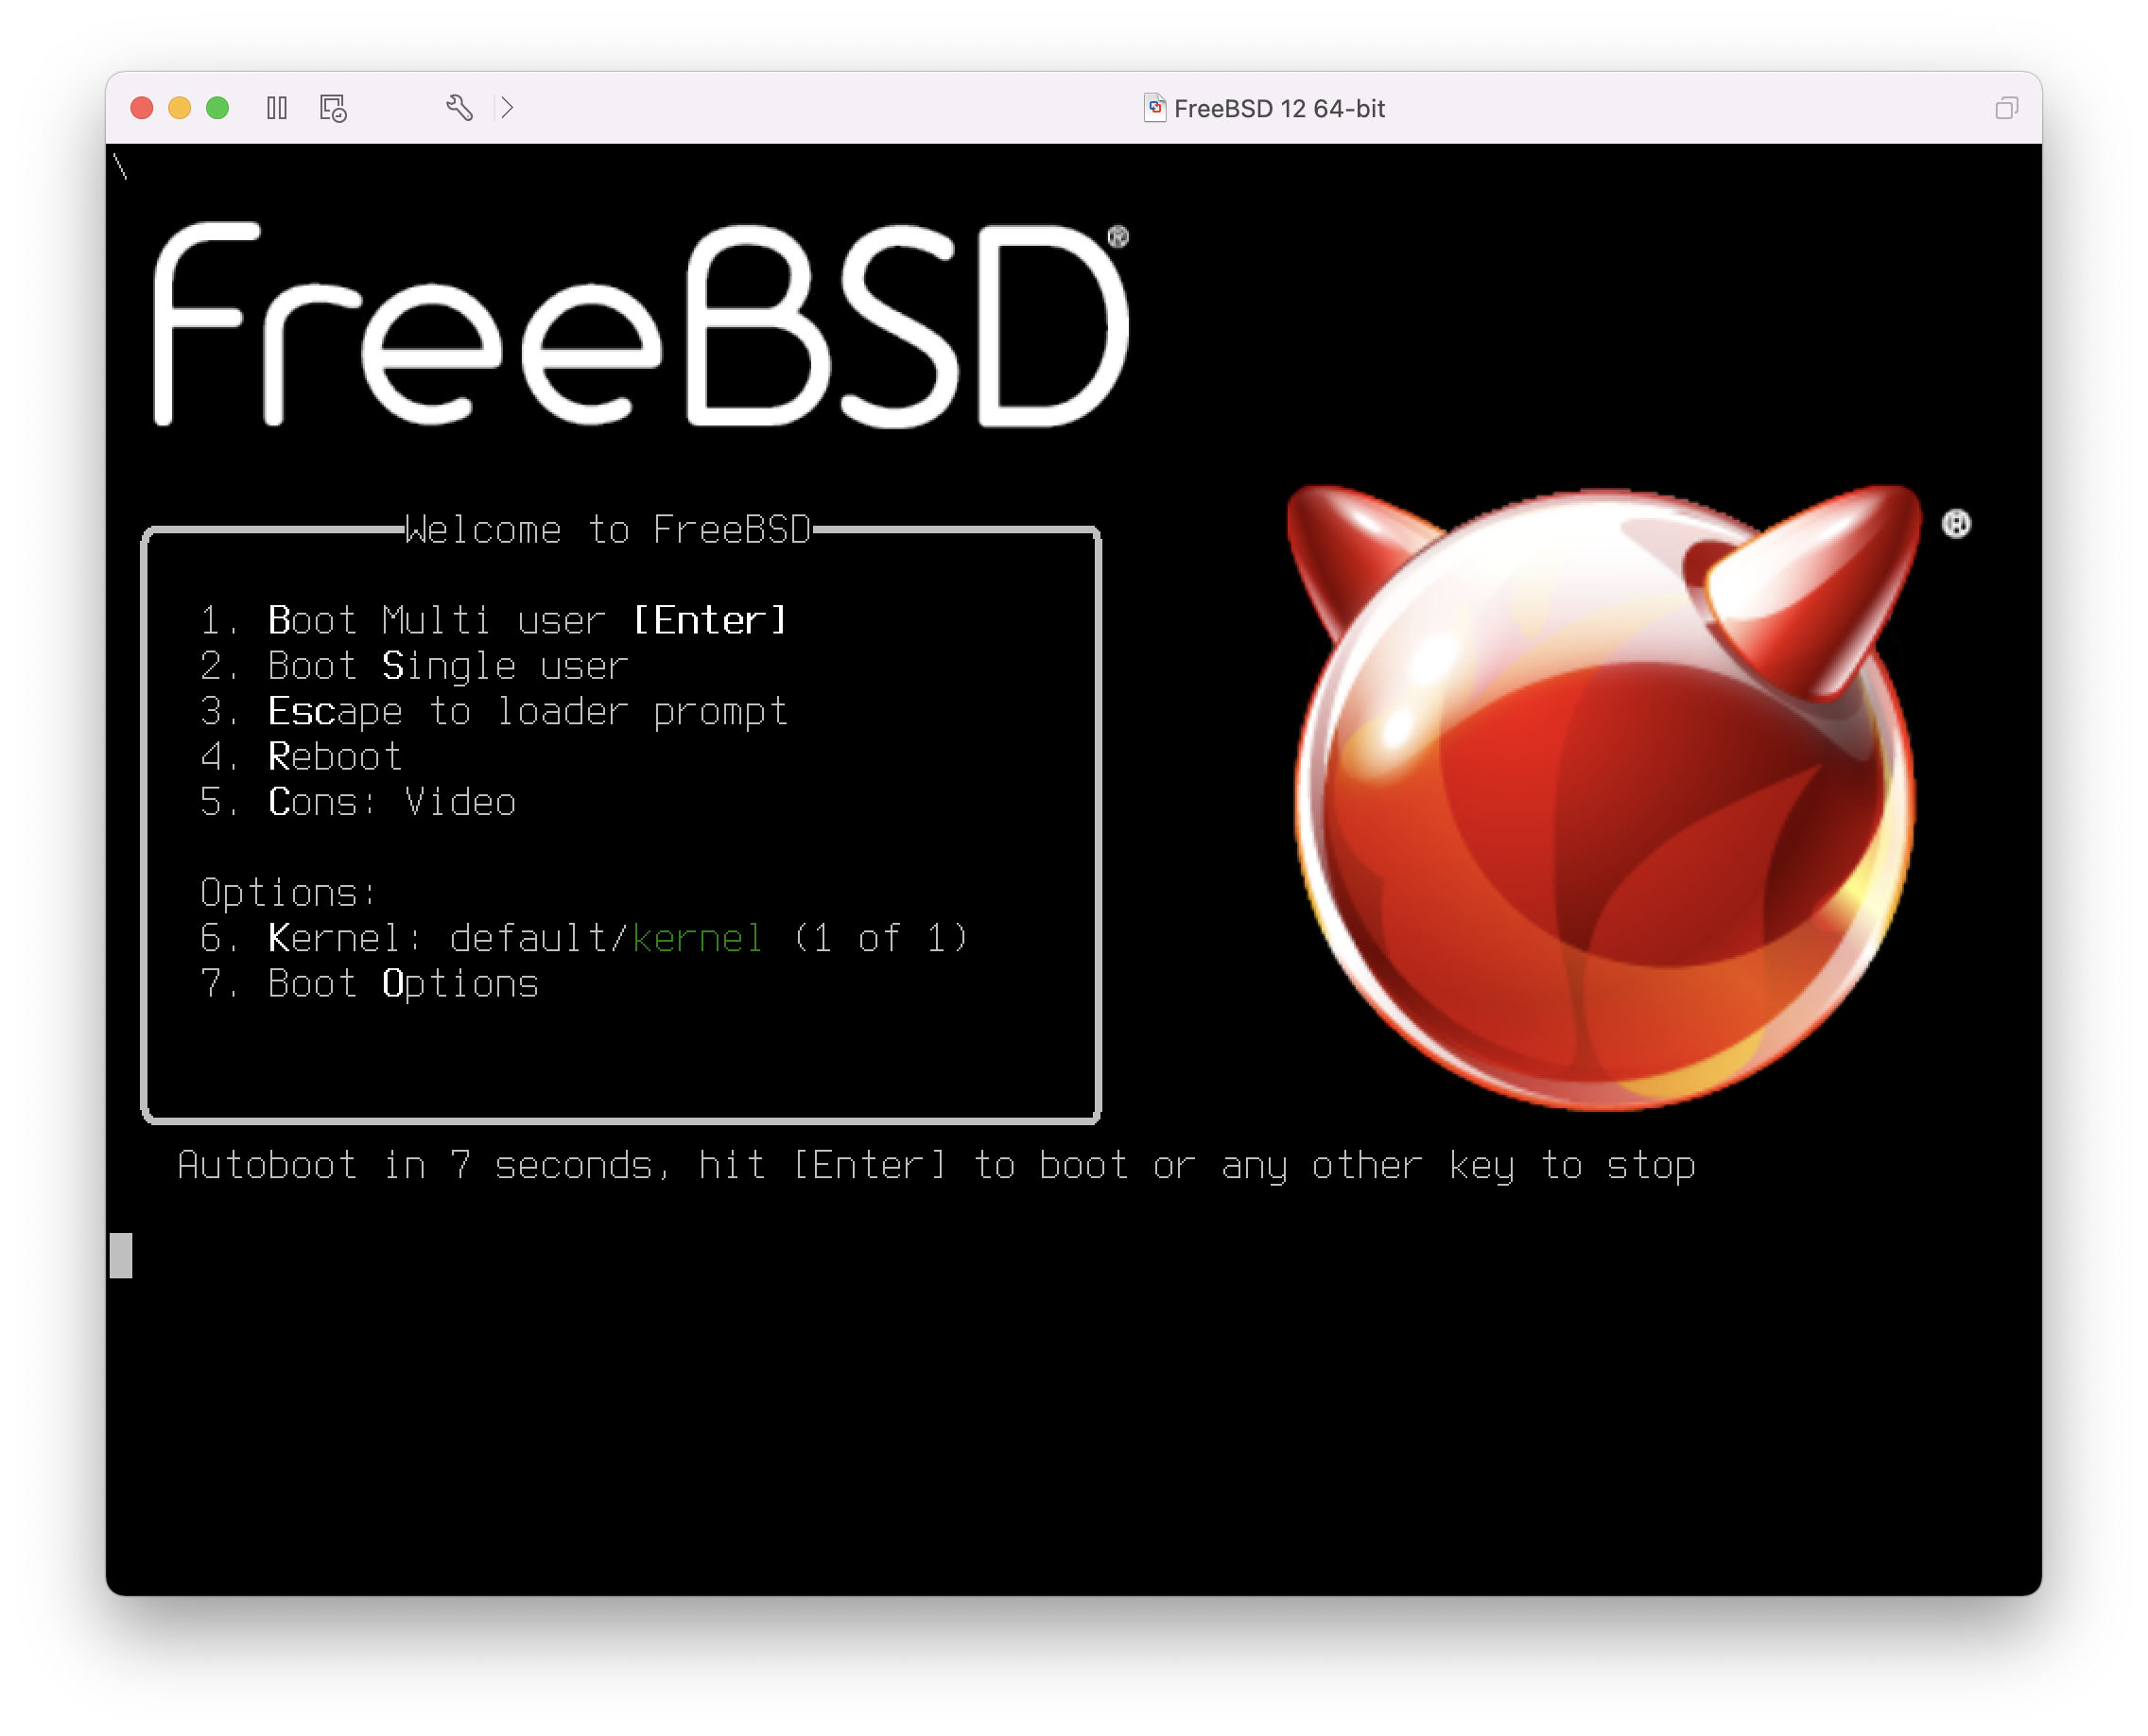
在 FreeBSD 虛擬機器新增後,就可以繼續以其安裝 FreeBSD。 安裝方面,比較好的作法是使用官方的 FreeBSD CD/DVD 或者是自官方 FTP 站下載的 ISO 映像檔。 複製適合的 ISO 映像檔到 Mac™ 檔案系統本地端或放入 CD/DVD 到 Mac™ 的 CD-ROM 磁碟機。在 FreeBSD Parallels 視窗的右下角點選磁碟圖示後會出現一個視窗,可用來建立虛擬機器內的 CD-ROM 磁碟機與磁碟上 ISO 檔案或實際 CD-ROM 磁碟機的關聯。
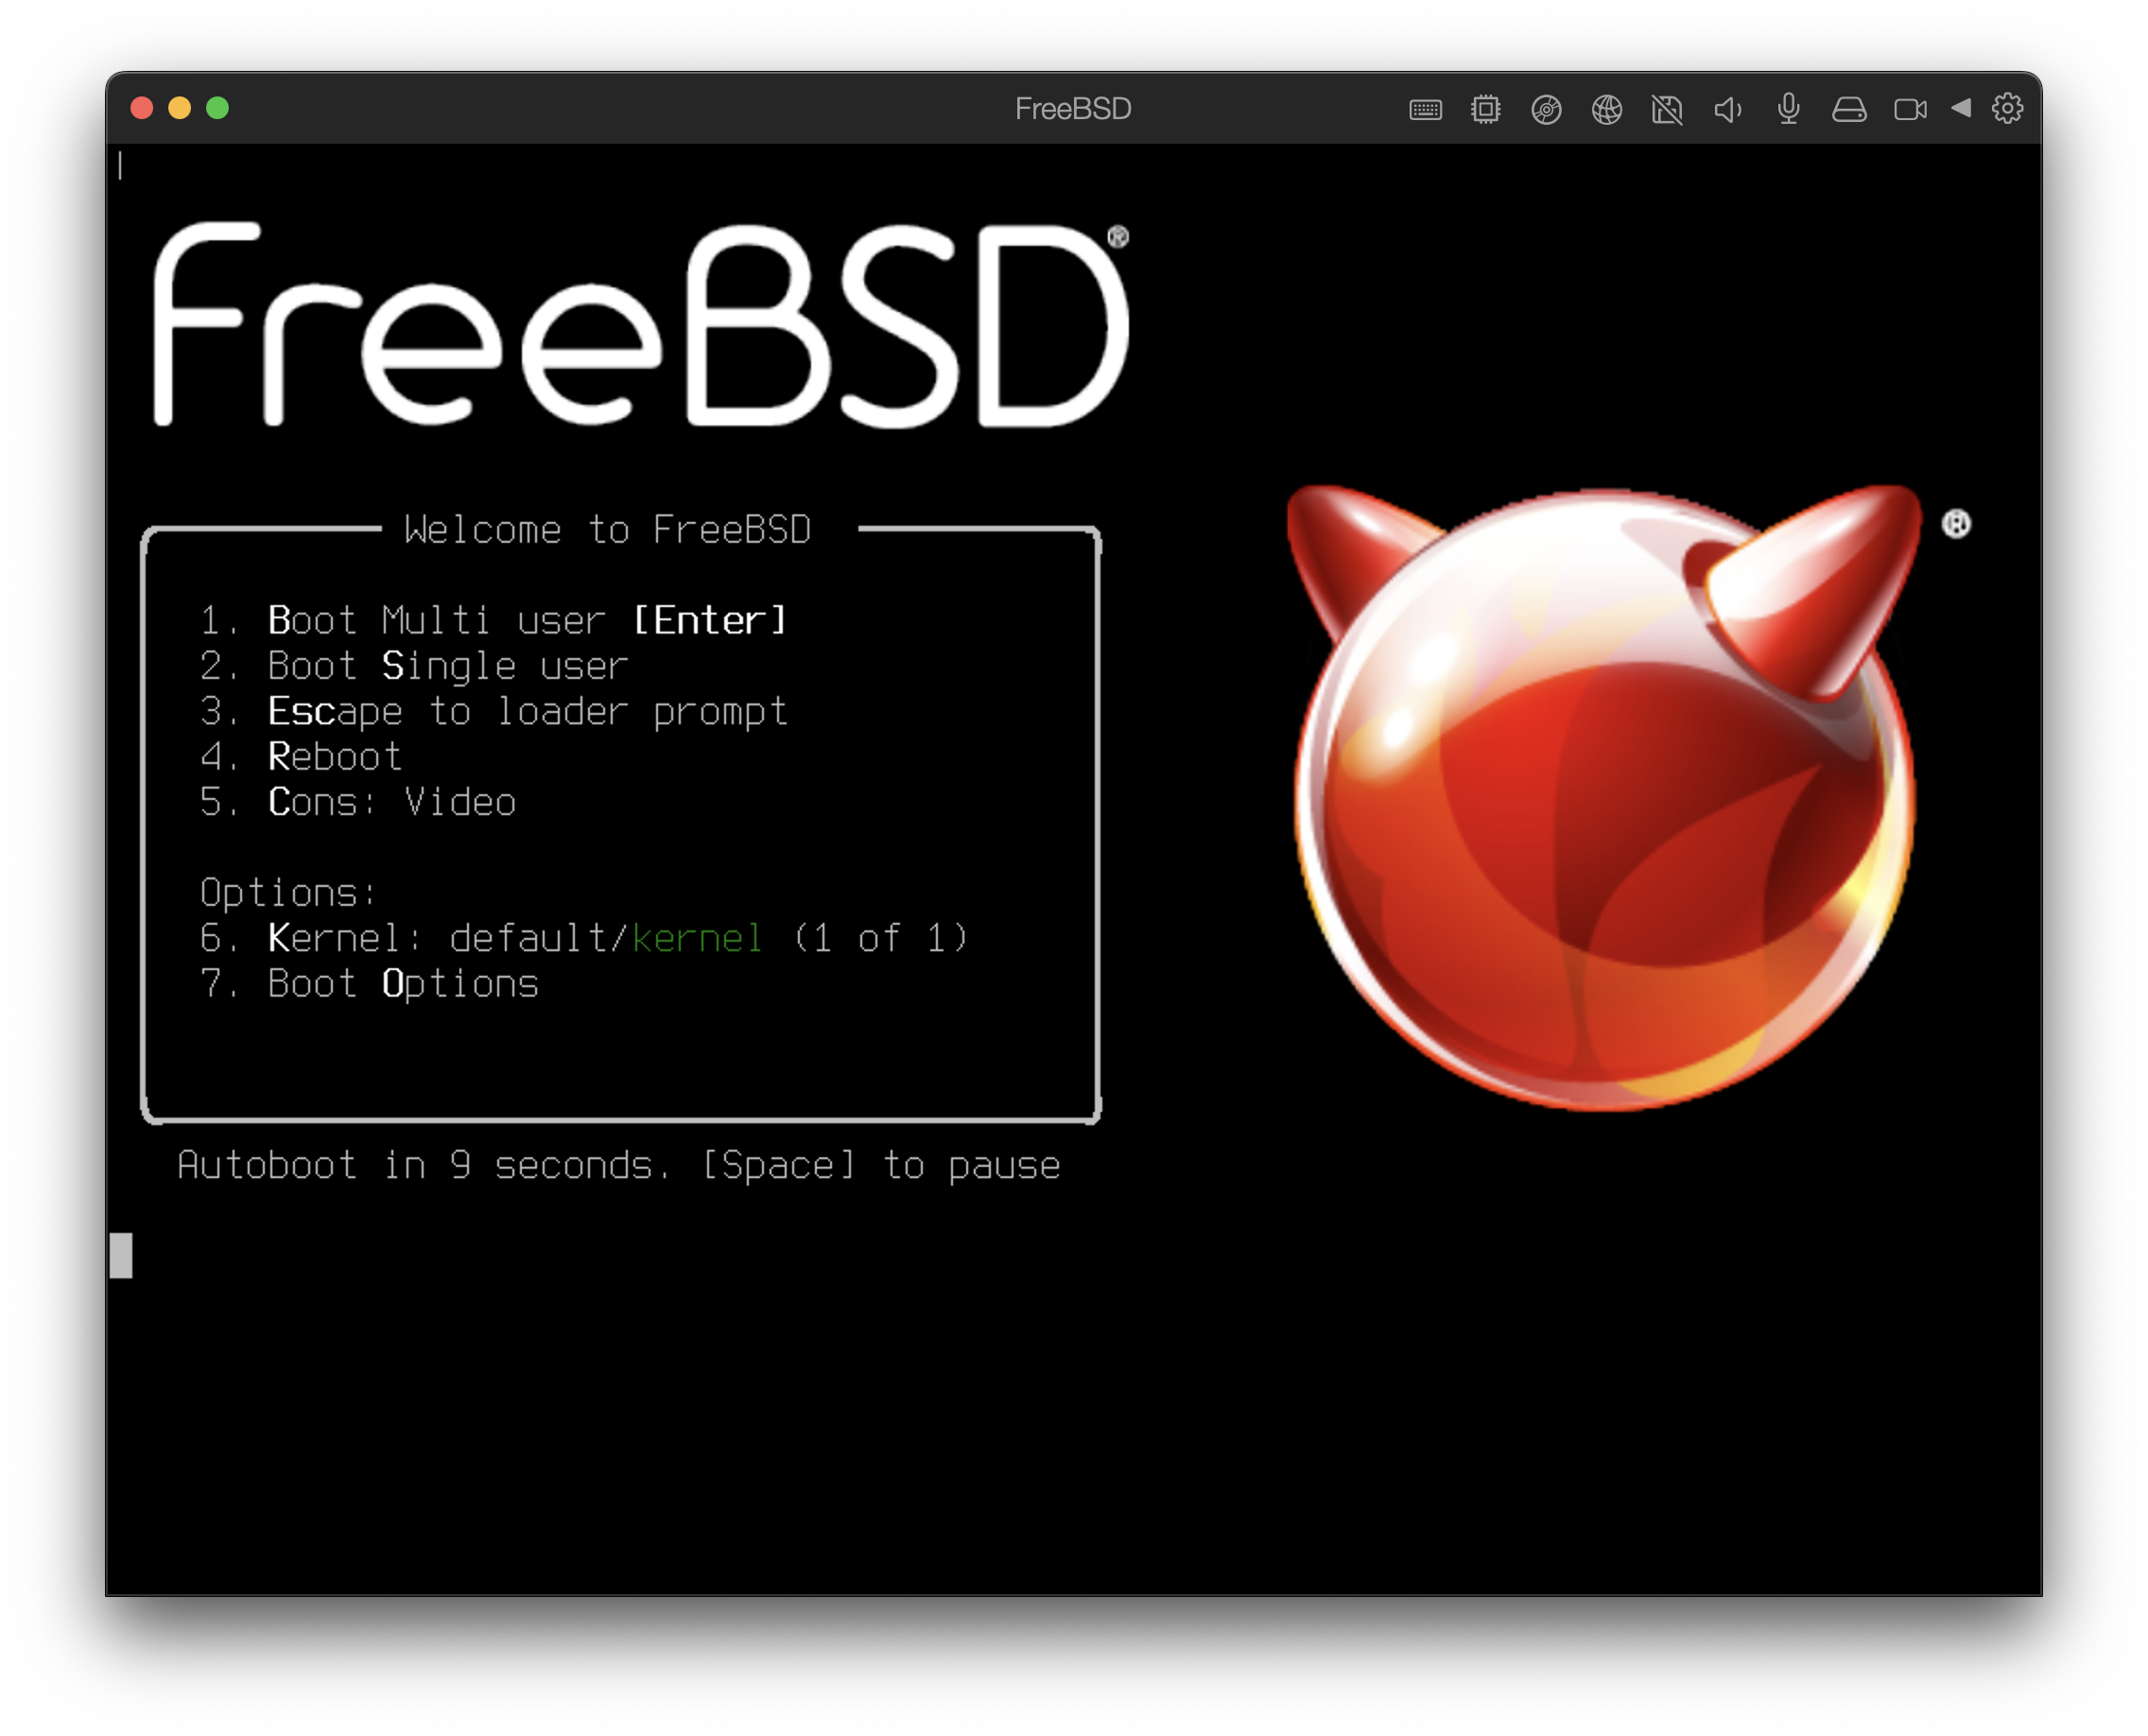
建立與 CD-ROM 來源的關聯後,點選重新開機圖示重新開啟 FreeBSD 虛擬機器。Parallels 會重新開機進入一個特殊的 BIOS 畫面並檢查是否有 CD-ROM。
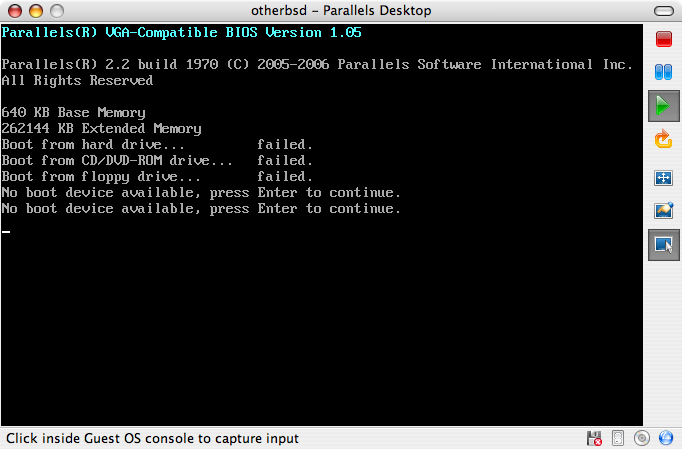
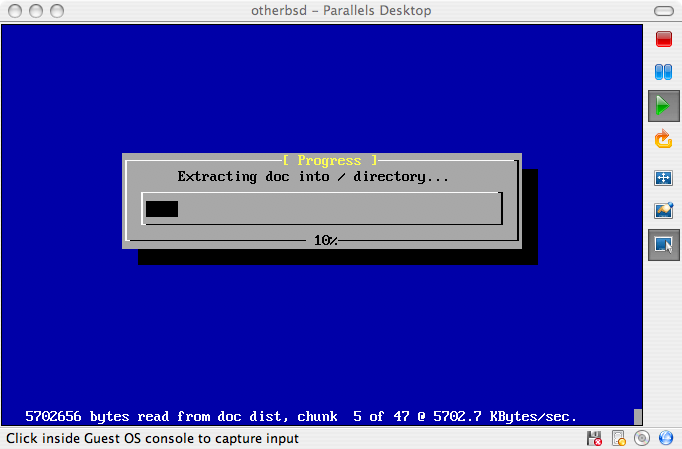
在此處會找到 FreeBSD 安裝媒體並開始正常的 FreeBSD 安裝程序。完成安裝,但不要在此時嘗試設定 Xorg。
當安裝完成後,重新開機將會進入新安裝的 FreeBSD 虛擬機器。
21.2.2. 在 Parallels 設定 FreeBSD
在成功將 FreeBSD 安裝到 Mac OS™ X 的 Parallels 後,有數個設定步驟要完成來最佳化系統在虛擬機器上的運作。
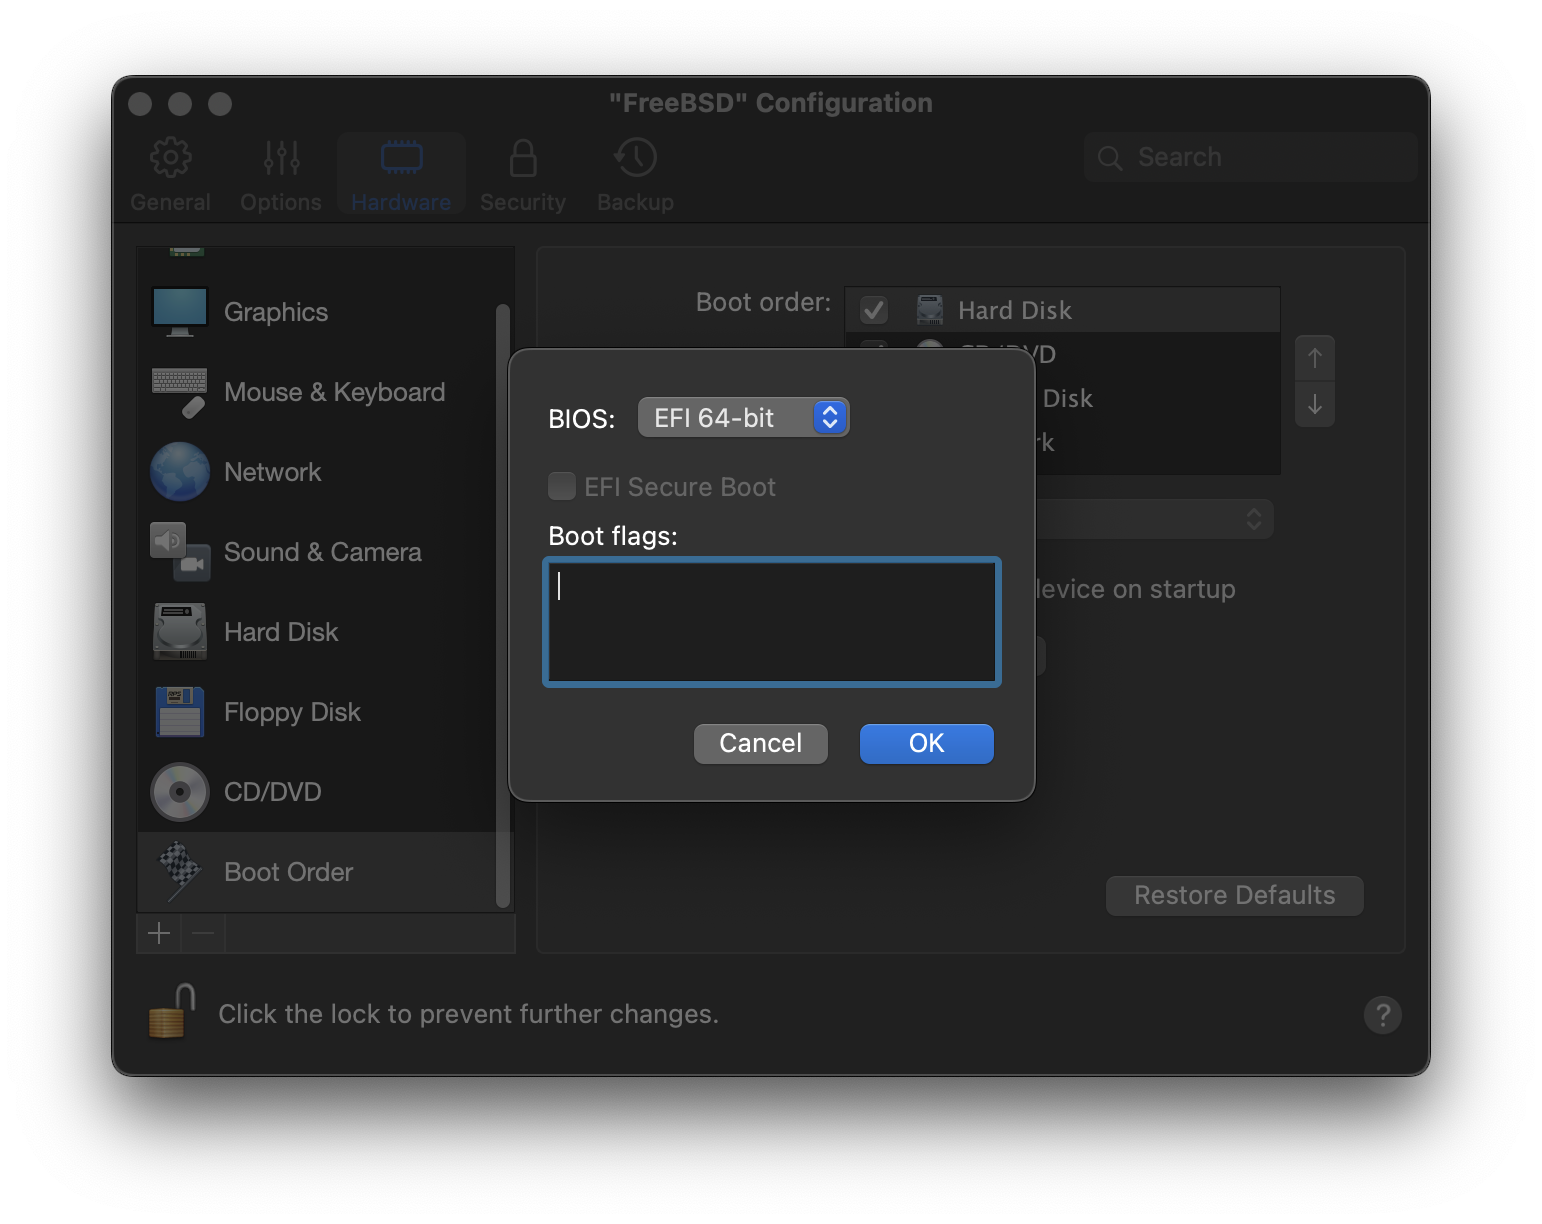
設定 Boot Loader 變數
最重要的一個步驟是減少
kern.hz參數來減少 FreeBSD 在 Parallels 環境下對 CPU 的使用率。加入以下行到 /boot/loader.conf 來完成這個動作:kern.hz=100
若沒有完成此設定,閒置的 FreeBSD Parallels 客端將會消耗掉單一處理器的 iMac™ 將近 15% 的 CPU。完成此更改後使用率會減至接近 5%。
建立新核心設定檔
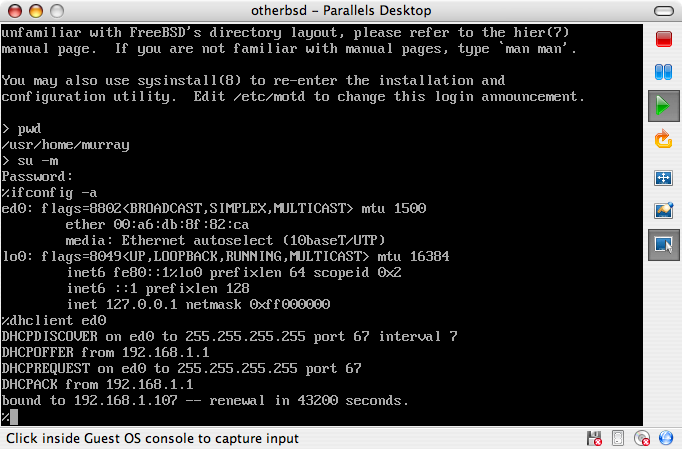
設定網路
最基本的網路設定是使用 DHCP 來讓虛擬機器連線到與主端 Mac™ 相同的區域網路,這可以透過加入
ifconfig_ed0="DHCP"到 /etc/rc.conf 來完成。更進階的網路設定在 進階網路設定 中描述。
21.3. 在 Windows™ 的 Virtual PC 安裝 FreeBSD 為客端
給 Windows™ 使用的 Virtual PC 是一套可免費下載的 Microsoft™ 軟體產品,請參考此網站取得系統需求。Virtual PC 在 Microsoft™ Windows™ 上安裝完成之後,使用者可以設定一台虛擬機器然後安裝想要的客端作業系統。
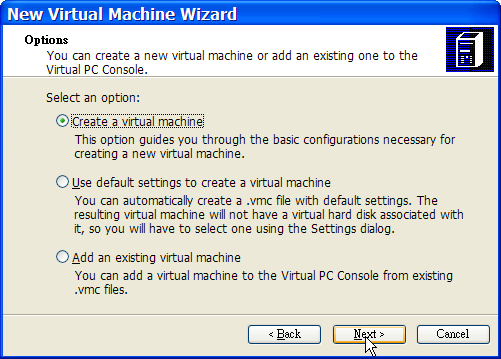
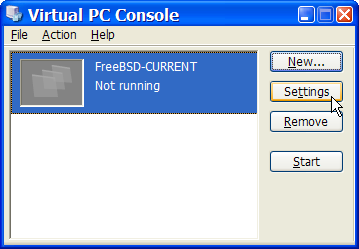
21.3.1. 在 Virtual PC 安裝 FreeBSD
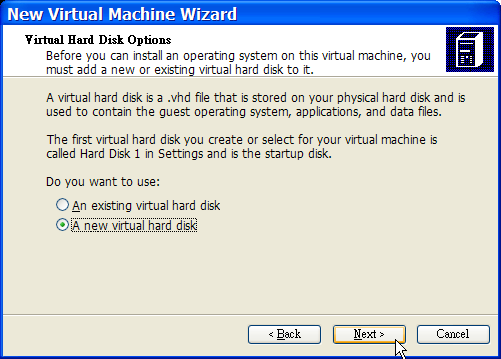
安裝 FreeBSD 到 Virtual PC 的第一個步驟是建立新的虛擬機器來安裝 FreeBSD。當提示畫面出現時,請選擇 :
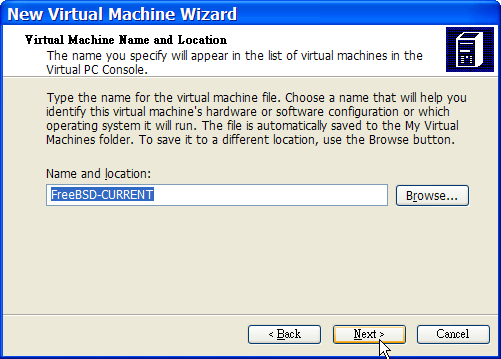
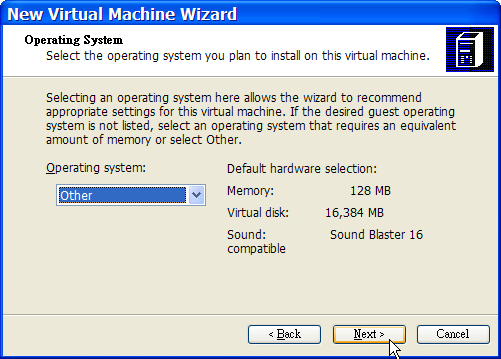
當提示畫面出現時,選擇 為 :
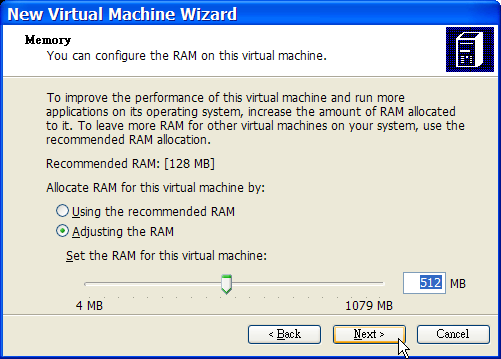
然後,根據您對此虛擬 FreeBSD 作業系統的規畫選擇合理的磁碟及記憶體空間,對大多數在 Virtual PC 下的 FreeBSD 使用來講 4GB 的磁碟空間與 512MB 的 RAM 便足夠:
儲存並完成設定:

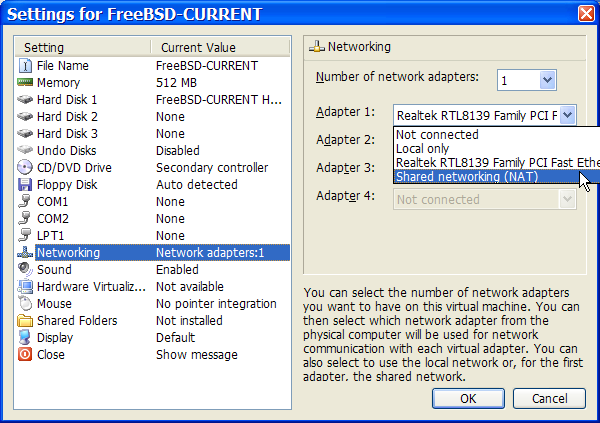
選擇 FreeBSD 虛擬機器然後點選 Settings,接著設定網路類型及網路介面卡:
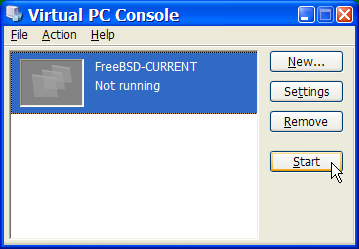
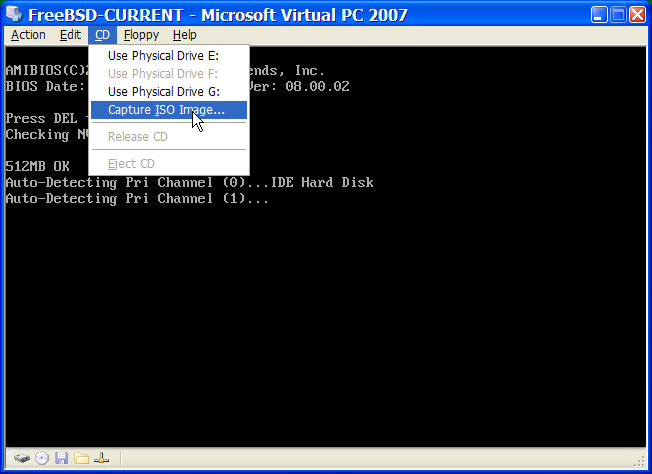
FreeBSD 虛擬機器建立完成之後,便可安裝 FreeBSD 到該虛擬機器。安裝最好使用官方 FreeBSD CD/DVD 或使用自官方 FTP 站下載的 ISO 映像檔。複製適當的 ISO 映像檔到本地 Windows™ 檔案系統或插入 CD/DVD 到 CD 磁碟機,然後雙擊點選 FreeBSD 虛擬機器來開機。接著,點選 CD 並在 Virtual PC 視窗選擇 Capture ISO Image…,這將會顯示一個視窗可以建立虛擬機器中的 CD-ROM 與 ISO 檔或磁碟或實體 CD-ROM 磁碟機之間的關聯。
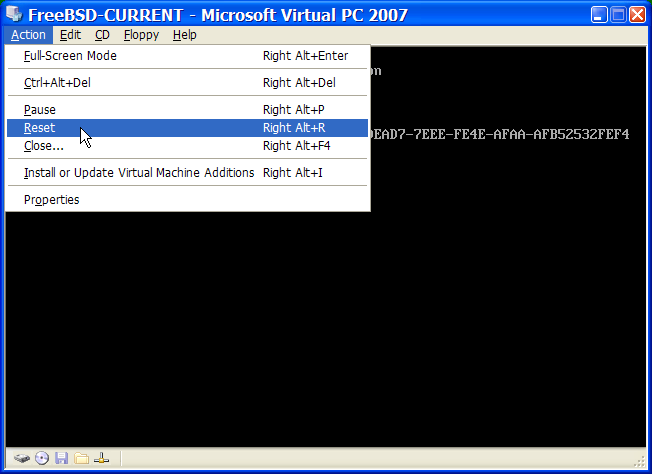
建立與 CD-ROM 來源的關聯後,點選 Action 及 Reset 重新開機 FreeBSD 虛擬機器。Virtual PC 會重新開始並進入特殊的 BIOS 來做 CD-ROM 的第一次檢查。
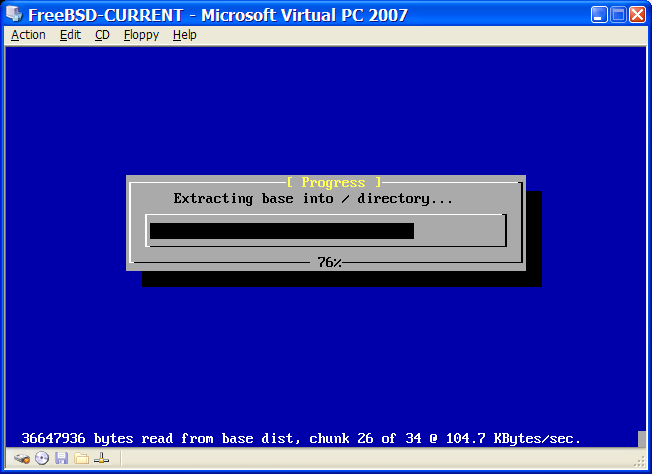
在這個情況下會找到 FreeBSD 安裝媒體然後開始正常的 FreeBSD 安裝。接著繼續安裝,但此時請不要嘗試設定 Xorg。
當安裝完成之後,記得退出 CD/DVD 或釋放 ISO 映像檔。最後,重新開機進入新安裝的 FreeBSD 虛擬機器。
21.3.2. 在 Virtual PC 設定 FreeBSD
在成功將 FreeBSD 安裝到 Microsoft™ Windows™ 的 Virtual PC 後,有數個設定步驟要完成來最佳化系統在虛擬機器上的運作。
設定 Boot Loader 變數
最重要的一個步驟是減少
kern.hz,來減少 FreeBSD 在 Virtual PC 環境下 CPU 的使用量。這可以透過加入下列幾行到 /boot/loader.conf 來完成:kern.hz=100
若沒有完成此設定,閒置的 FreeBSD Virtual PC 客端 OS 會消耗掉單一處理器的電腦 40% 的 CPU。完成此更改後使用率會減至接近 3%。
建立新核心設定檔
設定網路
最基本的網路設定是使用 DHCP 來讓虛擬機器連線到與主端 Microsoft™ Windows™ 相同的區域網路,這可以透過加入
ifconfig_de0="DHCP"到 /etc/rc.conf 來完成。更進階的網路設定在 進階網路設定 中描述。
21.4. 在 Mac OS™ 的 VMware Fusion 安裝 FreeBSD 為客端
VMware Fusion 是一套商業軟體可在 Intel™ 為基礎的 Apple™Mac™ 的 Mac OS™ 10.4.9 或更新版本上執行。 該軟體完全支援使用 FreeBSD 作為客端作業系統。 在 Mac OS™ X 裝好 VMware Fusion 後,使用者必先完成虛擬機器的設定後才可安裝想使用的客端作業系統。
21.4.1. 在 VMware Fusion 安裝 FreeBSD
第一個步驟是啟動 VMware Fusion 載入 Virtual Machine Library,點選 建立虛擬機器:
這個動做會載入 New Virtual Machine Assistant,點選 繼續:
選擇 為 以及在 Version 提示出現時選擇 或 :

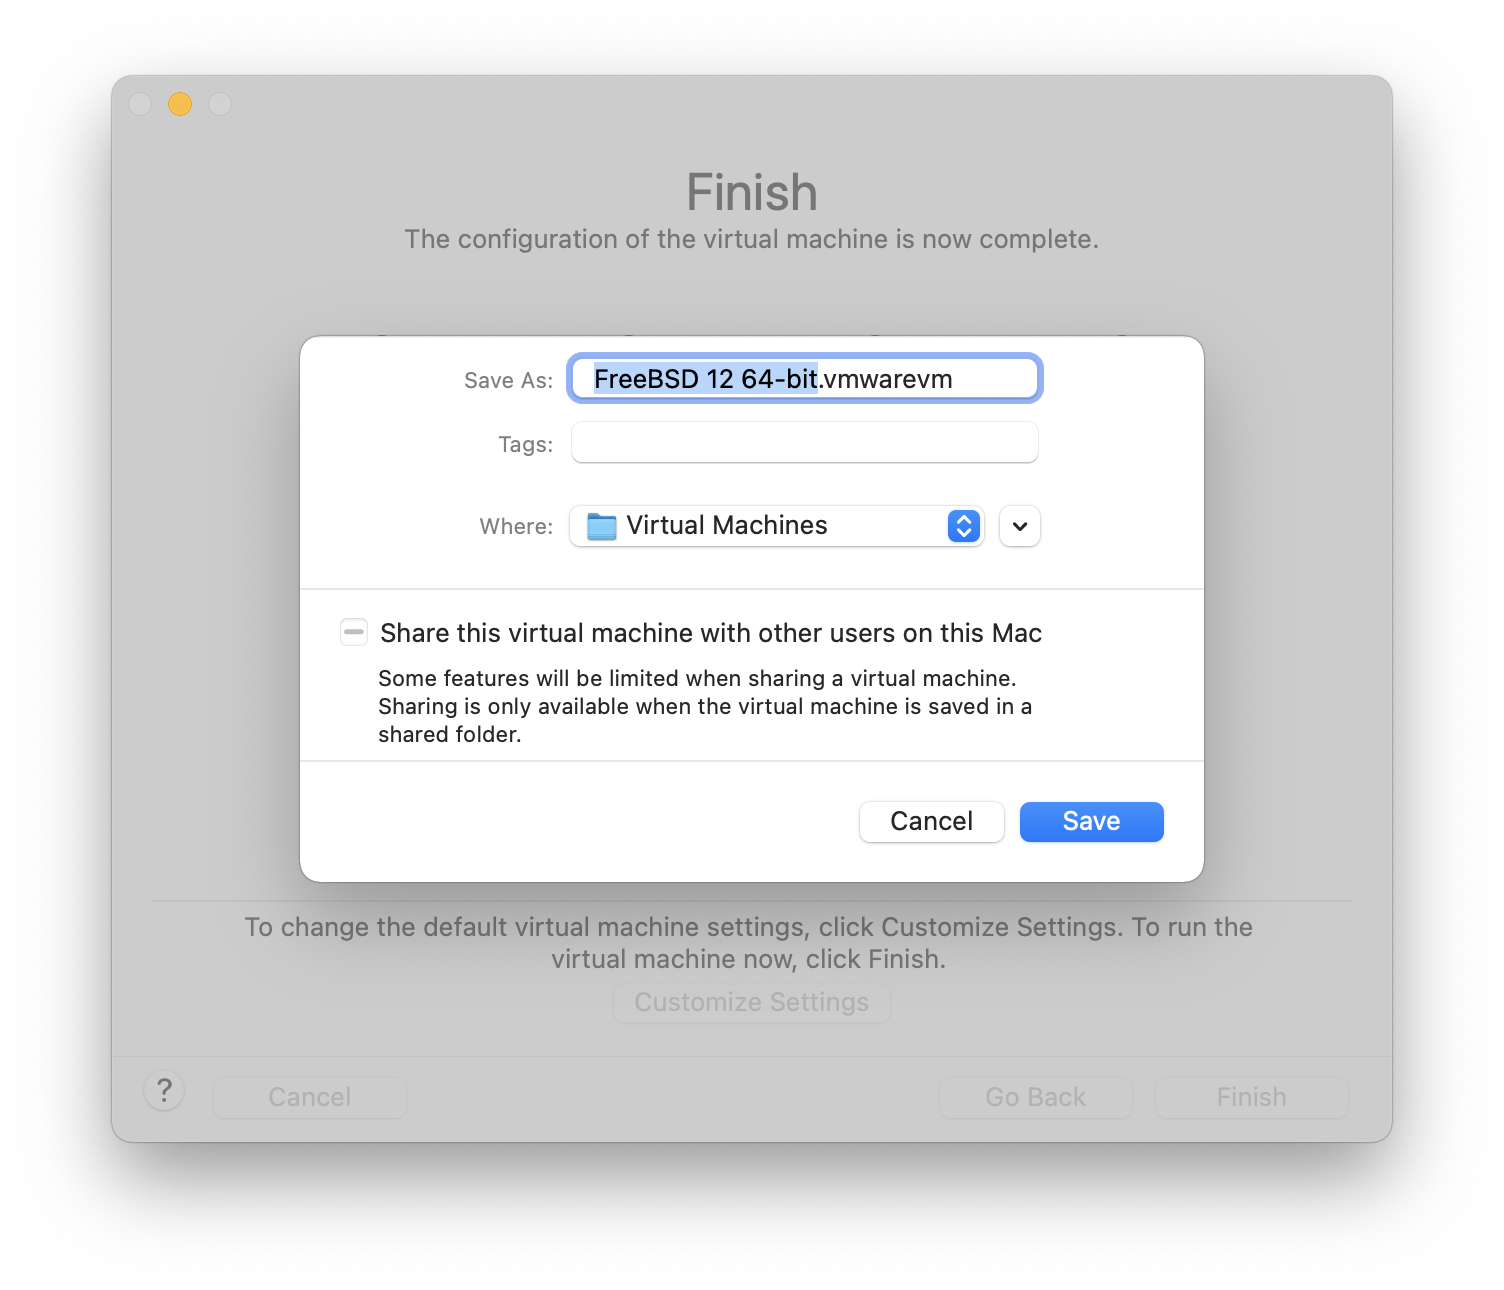
選擇虛擬機器要使用的名稱以及要儲存目錄位置:
選擇虛擬機器的 Virtual Hard Disk 大小:
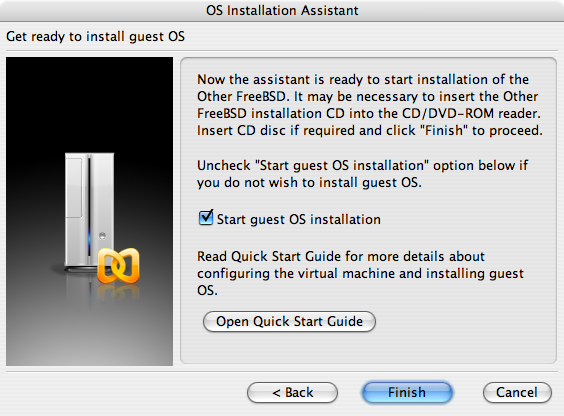
選擇安裝虛擬機器的方式,可從 ISO 映像檔或從 CD/DVD:
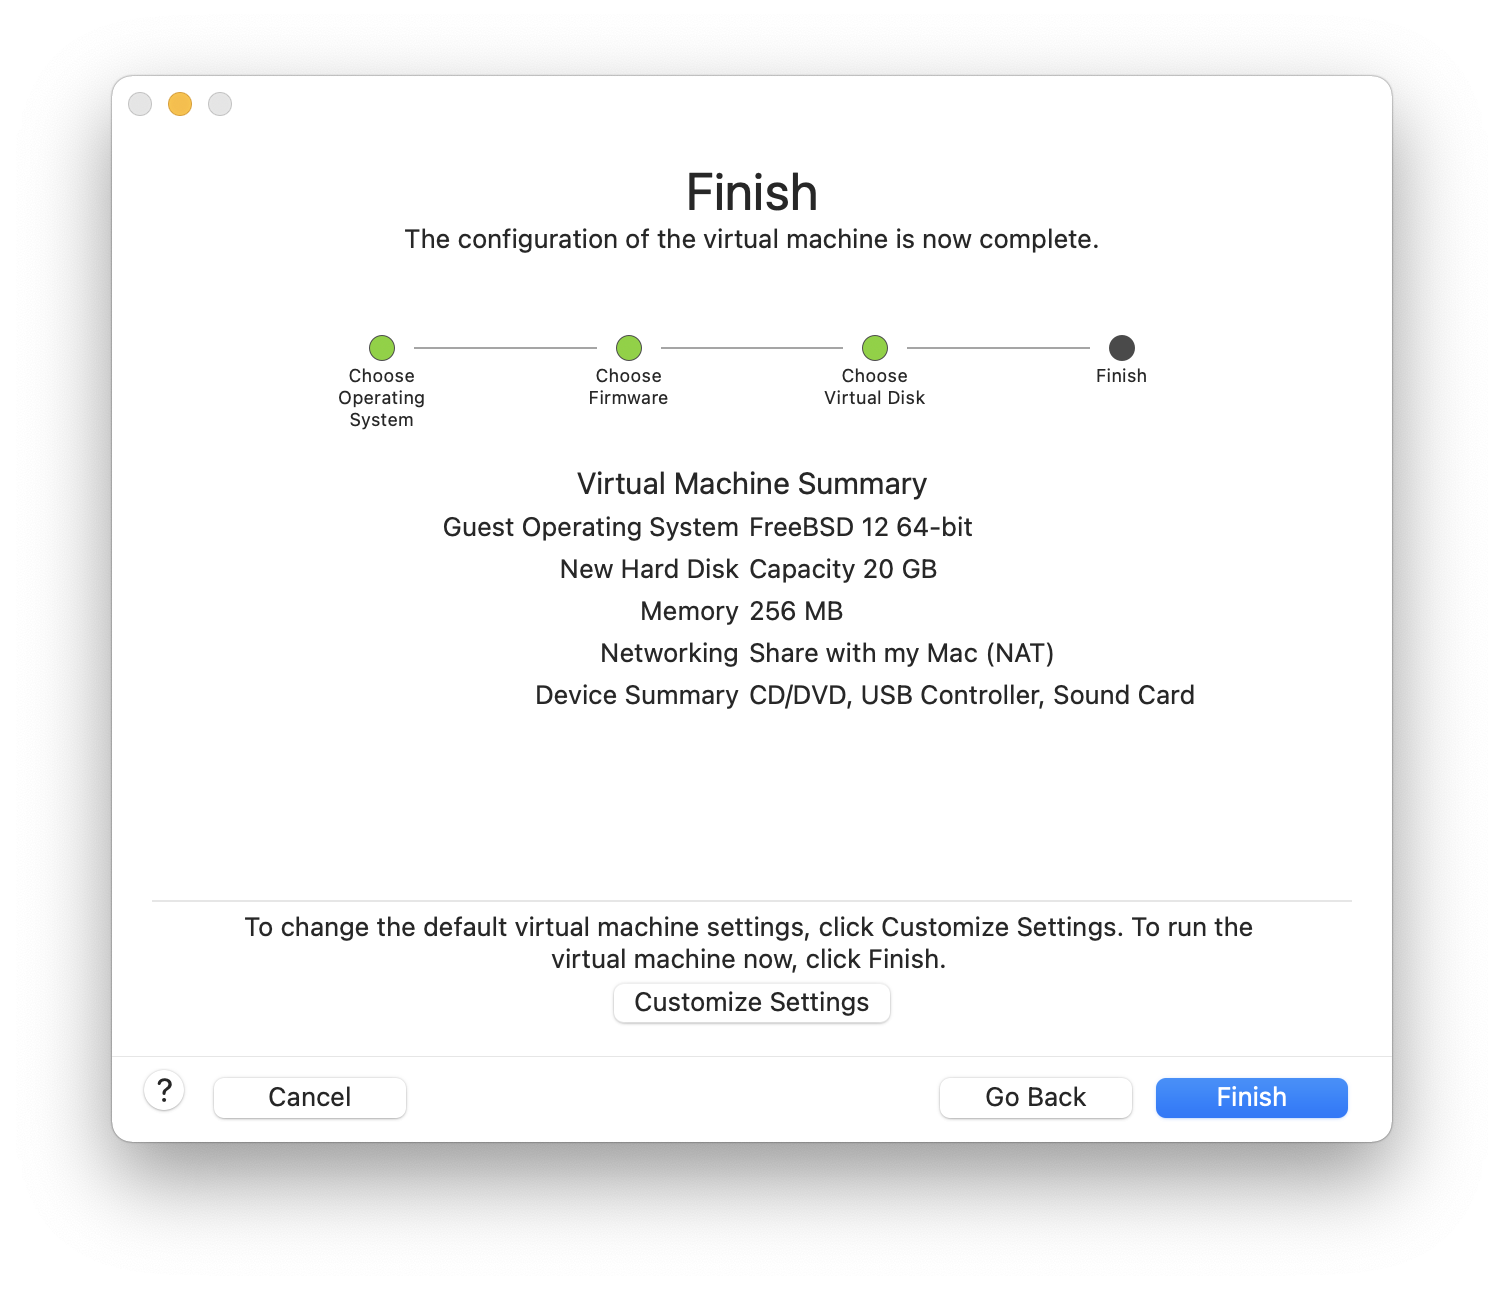
點選 接著虛擬機器會開機:
照往常方式安裝 FreeBSD:
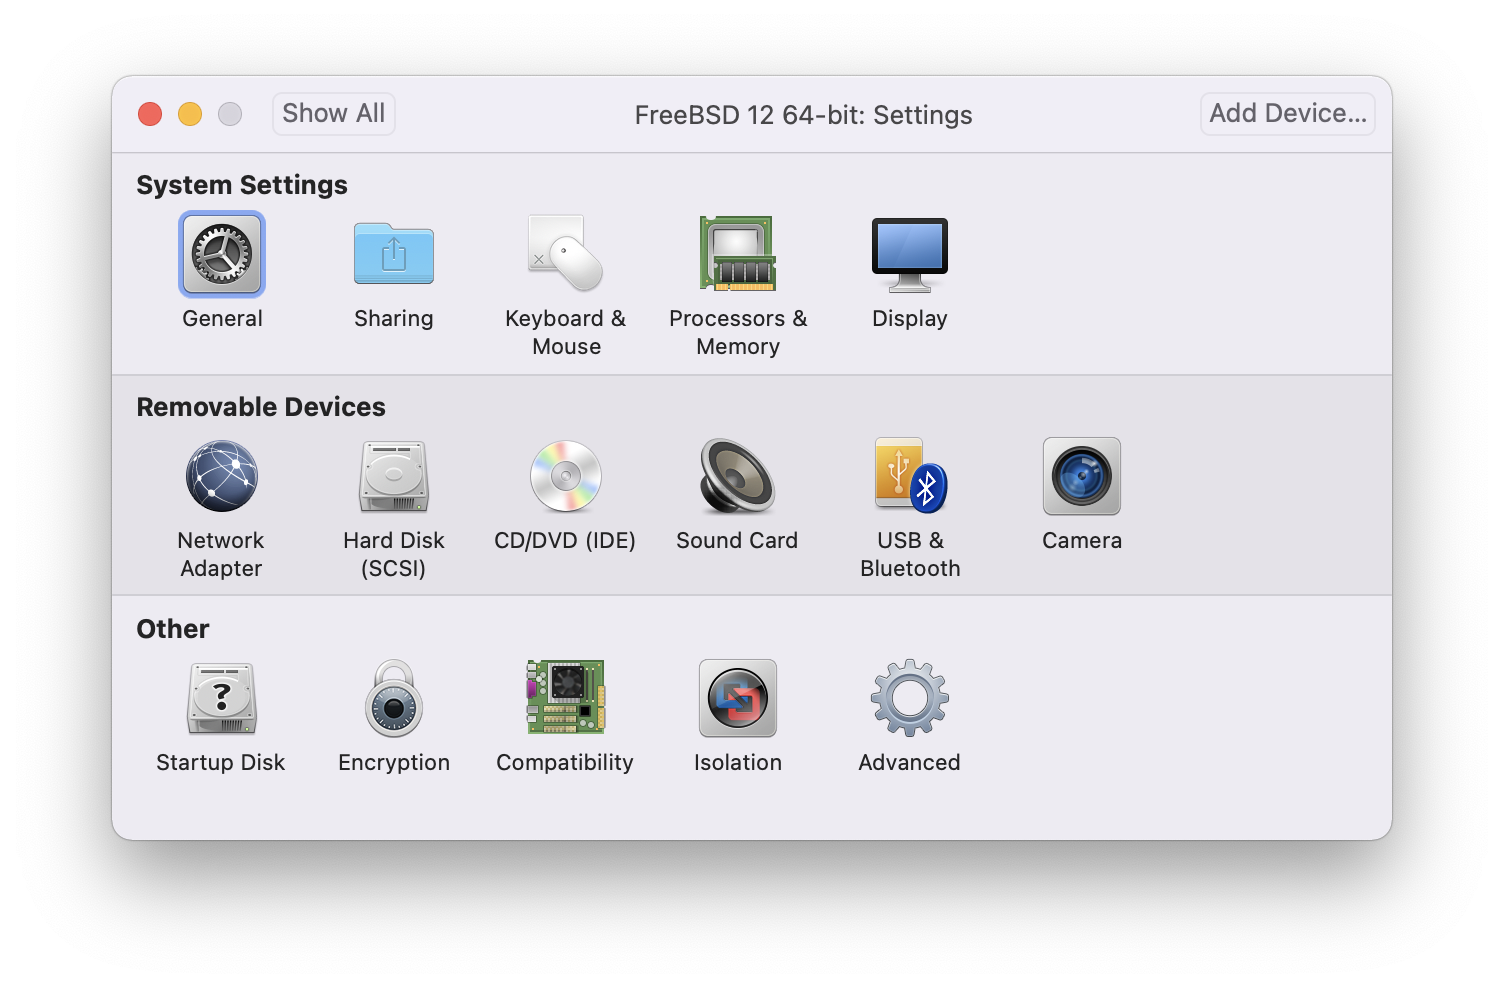
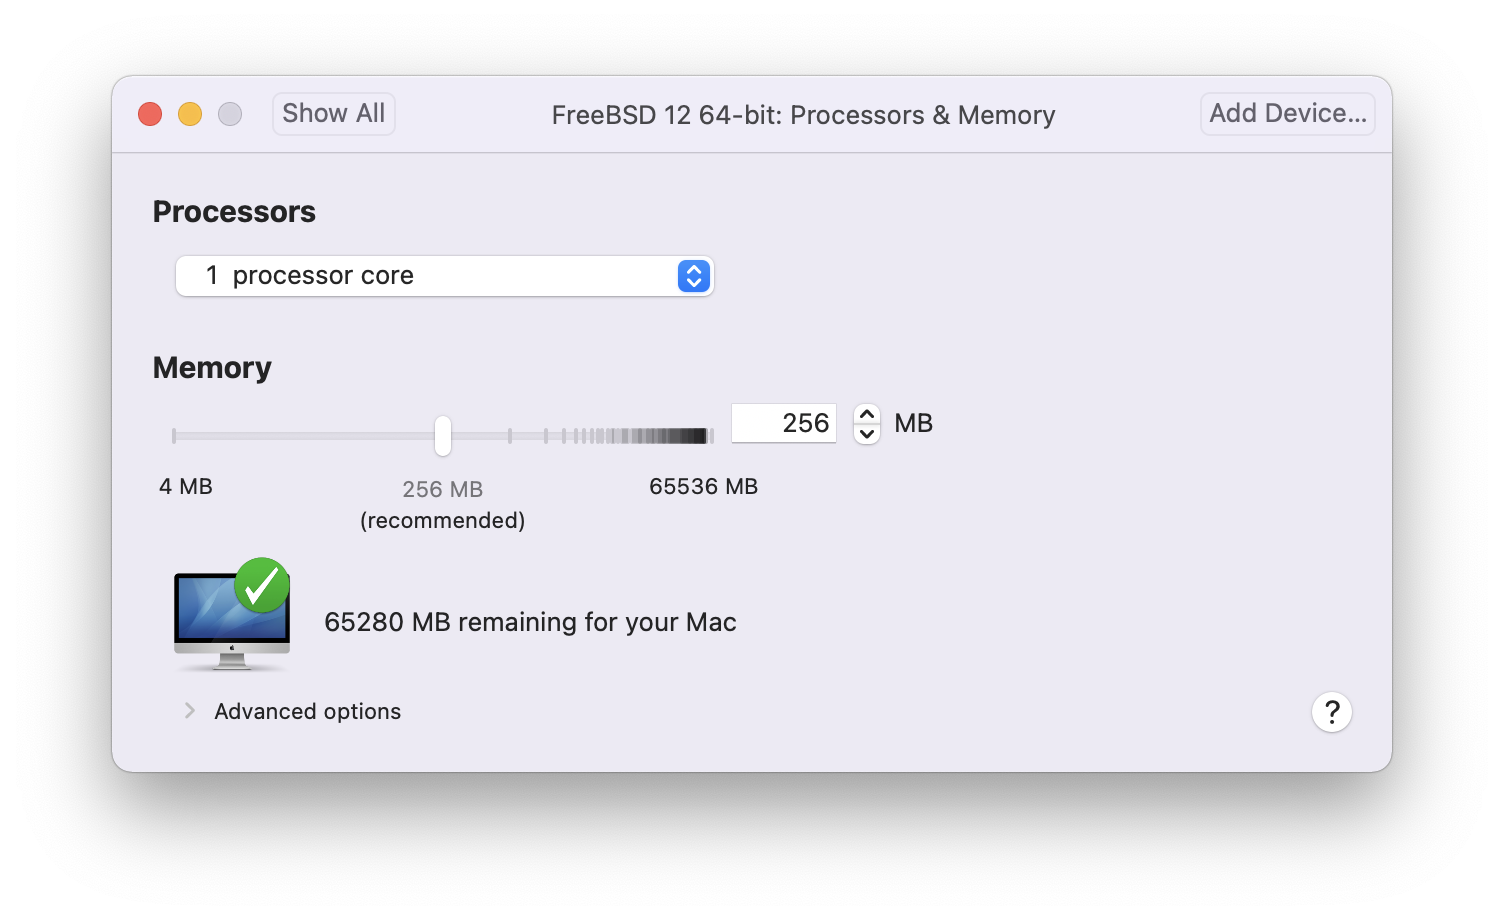
安裝完成後,可以修改虛擬機器的設定,例如記憶體使用量:
虛擬機器的 System Hardware 設定無法在虛擬機器執行時修改。 |
虛擬機器要使用的 CPU 數量:
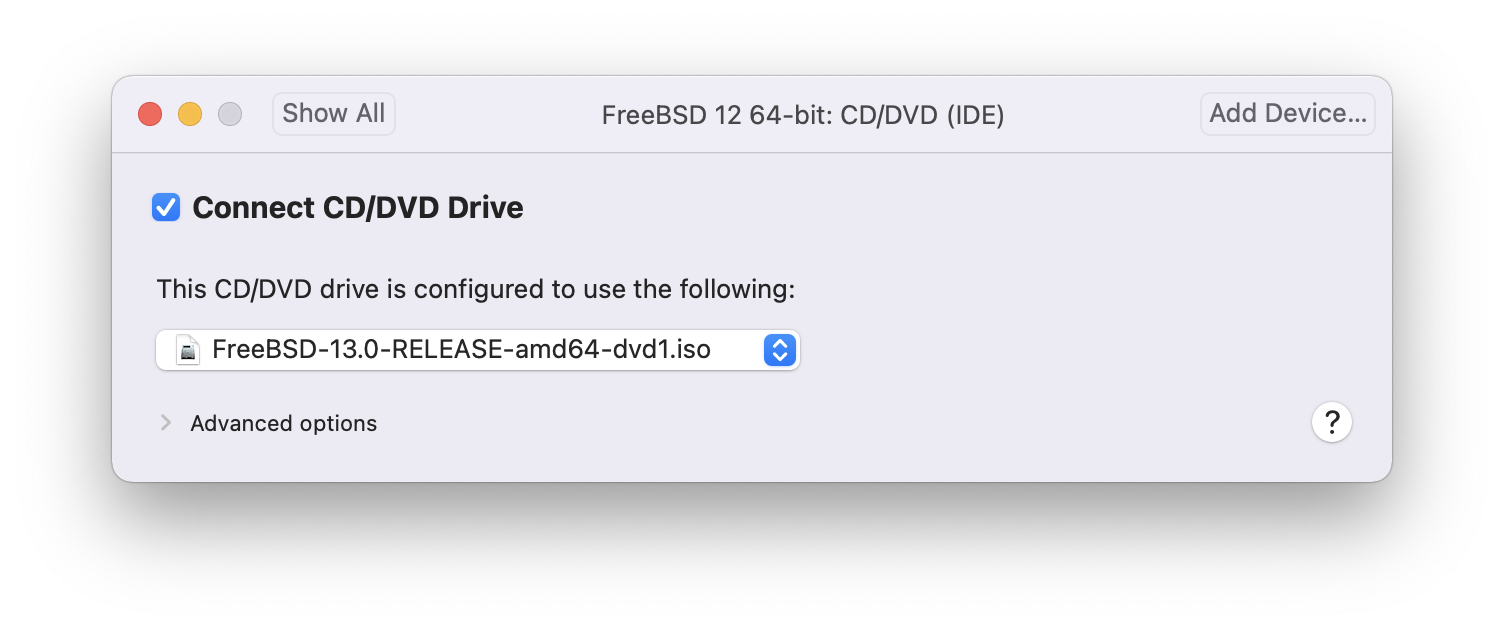
CD-ROM 裝置的狀態,正常情況 CD/DVD/ISO 在不需要時會中斷與虛擬機器的連線。

最後一件事是更改虛擬機器連線到網路的方式,要允許除了主端以外的機器連線到虛擬機器,請選擇 。否則會偏好使用 來讓虛擬機器可以存取網際網路,但外部網路無法連線到虛擬機器。
在修改設定之後,開機進入新安裝的 FreeBSD 虛擬機器。
21.4.2. 在 VMware Fusion 設定 FreeBSD
在成功將 FreeBSD 安裝到 Mac OS™ X 的 VMware Fusion 後,有數個設定步驟要完成來最佳化系統在虛擬機器上的運作。
設定 Boot Loader 變數
最重要的一個步驟是減少
kern.hz,來減少 FreeBSD 在 VMware Fusion 環境下 CPU 的使用量。這可以透過加入下列幾行到 /boot/loader.conf 來完成:kern.hz=100
若沒有完成此設定,閒置的 FreeBSD VMware Fusion 客端將會消耗掉單一處理器的 iMac™ 將近 15% 的 CPU。完成此更改後使用率會減至接近 5%。
建立新核心設定檔
設定網路
最基本的網路設定是使用 DHCP 來讓虛擬機器連線到與主端 Mac™ 相同的區域網路,這可以透過加入
ifconfig_em0="DHCP"到 /etc/rc.conf 來完成。更進階的網路設定在 進階網路設定 中描述。
21.5. 在 VirtualBox™ 安裝 FreeBSD 作為客端
在 VirtualBox™ 中使用 FreeBSD 做為客端系統也可運作的很好,虛擬化軟體可支援最常見的幾個作業系統,這當然也包含 FreeBSD。
VirtualBox™ guest additions 支援以下功能:
剪貼簿共享。
滑鼠指標整合。
主機時間同步。
視窗縮放。
無痕模式。
以下指令均是在 FreeBSD 客端中執行。 |
首先,在 FreeBSD 客端安裝 emulators/virtualbox-ose-additions 套件或 Port,以下指令會安裝 Port:
# cd /usr/ports/emulators/virtualbox-ose-additions && make install clean加入下行到 /etc/rc.conf:
vboxguest_enable="YES"
vboxservice_enable="YES"
若有使用 ntpd(8) 或 ntpdate(8),便可關閉主機時間同步功能:
vboxservice_flags="--disable-timesync"
Xorg 會自動辨識 vboxvideo 驅動程式,也可手動在 /etc/X11/xorg.conf 中輸入:
Section "Device"
	Identifier "Card0"
	Driver "vboxvideo"
	VendorName "InnoTek Systemberatung GmbH"
	BoardName "VirtualBox Graphics Adapter"
EndSection
要使用 vboxmouse 驅動程式,可調整在 /etc/X11/xorg.conf 中與滑鼠相關的一節:
Section "InputDevice"
	Identifier "Mouse0"
	Driver "vboxmouse"
EndSection
HAL 的使用者應建立以下 /usr/local/etc/hal/fdi/policy/90-vboxguest.fdi 或複製自 /usr/local/shared/hal/fdi/policy/10osvendor/90-vboxguest.fdi:
<?xml version="1.0" encoding="utf-8"?>
<!--
# Sun VirtualBox
# Hal driver description for the vboxmouse driver
# $Id: chapter.xml,v 1.33 2012-03-17 04:53:52 eadler Exp $

	Copyright (C) 2008-2009 Sun Microsystems, Inc.

	This file is part of VirtualBox Open Source Edition (OSE, as
	available from http://www.virtualbox.org. This file is free software;
	you can redistribute it and/or modify it under the terms of the GNU
	General Public License (GPL) as published by the Free Software
	Foundation, in version 2 as it comes in the "COPYING" file of the
	VirtualBox OSE distribution. VirtualBox OSE is distributed in the
	hope that it will be useful, but WITHOUT ANY WARRANTY of any kind.

	Please contact Sun Microsystems, Inc., 4150 Network Circle, Santa
	Clara, CA 95054 USA or visit http://www.sun.com if you need
	additional information or have any questions.
-->
<deviceinfo version="0.2">
  <device>
    <match key="info.subsystem" string="pci">
      <match key="info.product" string="VirtualBox guest Service">
        <append key="info.capabilities" type="strlist">input</append>
	<append key="info.capabilities" type="strlist">input.mouse</append>
        <merge key="input.x11_driver" type="string">vboxmouse</merge>
	<merge key="input.device" type="string">/dev/vboxguest</merge>
      </match>
    </match>
  </device>
</deviceinfo>
Shared folders for file transfers between host and VM are accessible by mounting them using mount_vboxvfs. A shared folder can be created on the host using the VirtualBox GUI or via vboxmanage. For example, to create a shared folder called myshare under /mnt/bsdboxshare for the VM named BSDBox, run:
# vboxmanage sharedfolder add 'BSDBox' --name myshare --hostpath /mnt/bsdboxshareNote that the shared folder name must not contain spaces. Mount the shared folder from within the guest system like this:
# mount_vboxvfs -w myshare /mnt21.6. 以 FreeBSD 作為主端使用 VirtualBox™
VirtualBox™ 是一套積極開發、完整的虛擬化套件,適用大多數作業系統,包含 Windows™, Mac OS™, Linux™ 與 FreeBSD,它同樣能夠執行類 Windows™ 或 UNIX™ 的客端系統。它是以開源軟體的方式發佈,但閉源元件可獨立在擴充包中使用,這些元件包含對 USB 2.0 裝置的支援。更多資訊可在 VirtualBox wiki 的 Downloads 頁面。目前,這些擴充套件並不支援 FreeBSD。
21.6.1. 安裝 VirtualBox™
VirtualBox™ 可於 emulators/virtualbox-ose 以 FreeBSD 套件或 Port 的方式取得。要安裝 Port 可使用以下指令:
# cd /usr/ports/emulators/virtualbox-ose
# make install clean
在 Port 的設定選單中 GuestAdditions 相關程式是最有用的選項之一,這些程式可在客端作業系統提供數個有用的功能,如滑鼠指標整合 (允許滑鼠在主端與客端之間移動,不需要按特殊快速鍵來切換) 與較快的影像繪圖速度,特別是在 Windows™ 的客端系統。Guest additions 可在客端系統安裝完之後的 Devices 選單找到。
還有一些設定需要在 VirtualBox™ 第一次啟動端做修改,Port 會安裝一個核心模組在 /boot/modules,該模組必須在核心中載入:
# kldload vboxdrv要確保該模組在重新開機後會載入,可加入下行到 /boot/loader.conf:
vboxdrv_load="YES"
要使用可支援橋接或僅限主端 (Host-only) 的網路,可加入下行到 /etc/rc.conf,然後重新啟動電腦:
vboxnet_enable="YES"
在安裝 VirtualBox™ 的過程中會建立 vboxusers 群組,所有需要存取 VirtualBox™ 的使用者均需要加入成為此群組的成員,pw 可用來加入新的成員:
# pw groupmod vboxusers -m yourusername/dev/vboxnetctl 的預設權限是受限的,需要更改後才可使用橋接網路:
# chown root:vboxusers /dev/vboxnetctl
# chmod 0660 /dev/vboxnetctl
要永久變更權限,可加入下列幾行到 /etc/devfs.conf:
own     vboxnetctl root:vboxusers
perm    vboxnetctl 0660
要執行 VirtualBox™,可在 Xorg 工作階段輸入:
% VirtualBox要取得更多有關設定與使用 VirtualBox™ 的資訊,請參考 官方網站。供 FreeBSD 特定的資訊與疑難排解操作指示,可參考 FreeBSD wiki 中相關的頁面。
21.6.2. VirtualBox™ USB 支援
VirtualBox™ can be configured to pass USB devices through to the guest operating system. The host controller of the OSE version is limited to emulating USB 1.1 devices until the extension pack supporting USB 2.0 and 3.0 devices becomes available on FreeBSD.
For VirtualBox™ to be aware of USB devices attached to the machine, the user needs to be a member of the operator group.
# pw groupmod operator -m yourusernameThen, add the following to /etc/devfs.rules, or create this file if it does not exist yet:
[system=10]
add path 'usb/*' mode 0660 group operator
若服務未執行,請加入下行到 /etc/rc.conf:
devfs_system_ruleset="system"
然後重新啟動 devfs:
# service devfs restart重新啟動登作階段與 VirtualBox™ 來讓這些變更生效,且建立必要的 USB 的過濾器。
21.6.3. VirtualBox™ Host DVD/CD 存取
透過共享實體磁碟機可讓客端系統能夠存取主端系統的 DVD/CD 磁碟機。在 VirtualBox™ 中,這個功能可在虛擬機器設定中的儲存 (Storage) 視窗中設定。若需要,可先建立一個空的 IDECD/DVD 裝置,然後在跳出的選單中選擇要做為虛擬 CD/DVD 磁碟機的主端磁碟機,此時會出現一個標籤為 Passthrough 的核選方塊,勾選這個核選方塊可讓虛擬機器直接使用該硬體,例如,音樂 CD 或燒錄機只會在有勾選此選項時能夠運作。
VirtualBox™DVD/CD 功能要能運作需要執行 HAL,因此需在 /etc/rc.conf 中開啟,若該服務尚未啟動,則啟動它:
hald_enable="YES"
# service hald start為了讓使用者能夠使用 VirtualBox™DVD/CD 功能,這些使用者需要存取 /dev/xpt0, /dev/cdN 以及 /dev/passN,這通常可讓這些使用者成為 operator 的成員來達成。對這些裝置的權限必須加入下行到 /etc/devfs.conf 來修正:
perm cd* 0660
perm xpt0 0660
perm pass* 0660
# service devfs restart21.7. 以 FreeBSD 作為主端安裝 bhyve
The bhyveBSD-licensed hypervisor became part of the base system with FreeBSD 10.0-RELEASE. This hypervisor supports a number of guests, including FreeBSD, OpenBSD, and many Linux™ distributions. By default, bhyve provides access to serial console and does not emulate a graphical console. Virtualization offload features of newer CPUs are used to avoid the legacy methods of translating instructions and manually managing memory mappings.
The bhyve design requires a processor that supports Intel™ Extended Page Tables (EPT) or AMD™ Rapid Virtualization Indexing (RVI) or Nested Page Tables (NPT). Hosting Linux™ guests or FreeBSD guests with more than one vCPU requires VMX unrestricted mode support (UG). Most newer processors, specifically the Intel™ Core™ i3/i5/i7 and Intel™ Xeon™ E3/E5/E7, support these features. UG support was introduced with Intel’s Westmere micro-architecture. For a complete list of Intel™ processors that support EPT, refer to https://ark.intel.com/content/www/us/en/ark/search/featurefilter.html?productType=873&0_ExtendedPageTables=True. RVI is found on the third generation and later of the AMD Opteron™ (Barcelona) processors. The easiest way to tell if a processor supports bhyve is to run dmesg or look in /var/run/dmesg.boot for the POPCNT processor feature flag on the Features2 line for AMD™ processors or EPT and UG on the VT-x line for Intel™ processors.
21.7.1. 準備主端
The first step to creating a virtual machine in bhyve is configuring the host system. First, load the bhyve kernel module:
# kldload vmmThen, create a tap interface for the network device in the virtual machine to attach to. In order for the network device to participate in the network, also create a bridge interface containing the tap interface and the physical interface as members. In this example, the physical interface is igb0:
# ifconfig tap0 create
# sysctl net.link.tap.up_on_open=1
net.link.tap.up_on_open: 0 -> 1
# ifconfig bridge0 create
# ifconfig bridge0 addm igb0 addm tap0
# ifconfig bridge0 up
21.7.2. 建立 FreeBSD 客端
Create a file to use as the virtual disk for the guest machine. Specify the size and name of the virtual disk:
# truncate -s 16G guest.imgDownload an installation image of FreeBSD to install:
# fetch ftp://ftp.freebsd.org/pub/FreeBSD/releases/ISO-IMAGES/10.3/FreeBSD-10.3-RELEASE-amd64-bootonly.iso
FreeBSD-10.3-RELEASE-amd64-bootonly.iso       100% of  230 MB  570 kBps 06m17s
FreeBSD comes with an example script for running a virtual machine in bhyve. The script will start the virtual machine and run it in a loop, so it will automatically restart if it crashes. The script takes a number of options to control the configuration of the machine: -c controls the number of virtual CPUs, -m limits the amount of memory available to the guest, -t defines which tap device to use, -d indicates which disk image to use, -i tells bhyve to boot from the CD image instead of the disk, and -I defines which CD image to use. The last parameter is the name of the virtual machine, used to track the running machines. This example starts the virtual machine in installation mode:
# sh /usr/shared/examples/bhyve/vmrun.sh -c 1 -m 1024M -t tap0 -d guest.img -i -I FreeBSD-10.3-RELEASE-amd64-bootonly.iso guestnameThe virtual machine will boot and start the installer. After installing a system in the virtual machine, when the system asks about dropping in to a shell at the end of the installation, choose Yes.
Reboot the virtual machine. While rebooting the virtual machine causes bhyve to exit, the vmrun.sh script runs bhyve in a loop and will automatically restart it. When this happens, choose the reboot option from the boot loader menu in order to escape the loop. Now the guest can be started from the virtual disk:
# sh /usr/shared/examples/bhyve/vmrun.sh -c 4 -m 1024M -t tap0 -d guest.img guestname21.7.3. 建立 Linux™ 客端
In order to boot operating systems other than FreeBSD, the sysutils/grub2-bhyve port must be first installed.
Next, create a file to use as the virtual disk for the guest machine:
# truncate -s 16G linux.imgStarting a virtual machine with bhyve is a two step process. First a kernel must be loaded, then the guest can be started. The Linux™ kernel is loaded with sysutils/grub2-bhyve. Create a device.map that grub will use to map the virtual devices to the files on the host system:
(hd0) ./linux.img
(cd0) ./somelinux.iso
Use sysutils/grub2-bhyve to load the Linux™ kernel from the ISO image:
# grub-bhyve -m device.map -r cd0 -M 1024M linuxguestThis will start grub. If the installation CD contains a grub.cfg, a menu will be displayed. If not, the vmlinuz and initrd files must be located and loaded manually:
grub> ls
(hd0) (cd0) (cd0,msdos1) (host)
grub> ls (cd0)/isolinux
boot.cat boot.msg grub.conf initrd.img isolinux.bin isolinux.cfg memtest
splash.jpg TRANS.TBL vesamenu.c32 vmlinuz
grub> linux (cd0)/isolinux/vmlinuz
grub> initrd (cd0)/isolinux/initrd.img
grub> boot
Now that the Linux™ kernel is loaded, the guest can be started:
# bhyve -A -H -P -s 0:0,hostbridge -s 1:0,lpc -s 2:0,virtio-net,tap0 -s 3:0,virtio-blk,./linux.img \
    -s 4:0,ahci-cd,./somelinux.iso -l com1,stdio -c 4 -m 1024M linuxguest
The system will boot and start the installer. After installing a system in the virtual machine, reboot the virtual machine. This will cause bhyve to exit. The instance of the virtual machine needs to be destroyed before it can be started again:
# bhyvectl --destroy --vm=linuxguestNow the guest can be started directly from the virtual disk. Load the kernel:
# grub-bhyve -m device.map -r hd0,msdos1 -M 1024M linuxguest
grub> ls
(hd0) (hd0,msdos2) (hd0,msdos1) (cd0) (cd0,msdos1) (host)
(lvm/VolGroup-lv_swap) (lvm/VolGroup-lv_root)
grub> ls (hd0,msdos1)/
lost+found/ grub/ efi/ System.map-2.6.32-431.el6.x86_64 config-2.6.32-431.el6.x
86_64 symvers-2.6.32-431.el6.x86_64.gz vmlinuz-2.6.32-431.el6.x86_64
initramfs-2.6.32-431.el6.x86_64.img
grub> linux (hd0,msdos1)/vmlinuz-2.6.32-431.el6.x86_64 root=/dev/mapper/VolGroup-lv_root
grub> initrd (hd0,msdos1)/initramfs-2.6.32-431.el6.x86_64.img
grub> boot
Boot the virtual machine:
# bhyve -A -H -P -s 0:0,hostbridge -s 1:0,lpc -s 2:0,virtio-net,tap0 \
    -s 3:0,virtio-blk,./linux.img -l com1,stdio -c 4 -m 1024M linuxguest
Linux™ will now boot in the virtual machine and eventually present you with the login prompt. Login and use the virtual machine. When you are finished, reboot the virtual machine to exit bhyve. Destroy the virtual machine instance:
# bhyvectl --destroy --vm=linuxguest21.7.4. 使用 UEFI 韌體開機 bhyve 虛擬機器
In addition to bhyveload and grub-bhyve, the bhyve hypervisor can also boot virtual machines using the UEFI userspace firmware. This option may support guest operating systems that are not supported by the other loaders.
In order to make use of the UEFI support in bhyve, first obtain the UEFI firmware images. This can be done by installing sysutils/bhyve-firmware port or package.
With the firmware in place, add the flags -l bootrom,/path/to/firmware to your bhyve command line. The actual bhyve command may look like this:
# bhyve -AHP -s 0:0,hostbridge -s 1:0,lpc \
-s 2:0,virtio-net,tap1 -s 3:0,virtio-blk,./disk.img \
-s 4:0,ahci-cd,./install.iso -c 4 -m 1024M \
-l bootrom,/usr/local/shared/uefi-firmware/BHYVE_UEFI.fd \
guest
sysutils/bhyve-firmware also contains a CSM-enabled firmware, to boot guests with no UEFI support in legacy BIOS mode:
# bhyve -AHP -s 0:0,hostbridge -s 1:0,lpc \
-s 2:0,virtio-net,tap1 -s 3:0,virtio-blk,./disk.img \
-s 4:0,ahci-cd,./install.iso -c 4 -m 1024M \
-l bootrom,/usr/local/shared/uefi-firmware/BHYVE_UEFI_CSM.fd \
guest
21.7.5. 供 bhyve 客端用的圖型化 UEFI Framebuffer
The UEFI firmware support is particularly useful with predominantly graphical guest operating systems such as Microsoft Windows™.
Support for the UEFI-GOP framebuffer may also be enabled with the -s 29,fbuf,tcp=0.0.0.0:5900 flags. The framebuffer resolution may be configured with w=800 and h=600, and bhyve can be instructed to wait for a VNC connection before booting the guest by adding wait. The framebuffer may be accessed from the host or over the network via the VNC protocol.
bhyve 指令的結果會如下:
# bhyve -AHP -s 0:0,hostbridge -s 31:0,lpc \
-s 2:0,virtio-net,tap1 -s 3:0,virtio-blk,./disk.img \
-s 4:0,ahci-cd,./install.iso -c 4 -m 1024M \
-s 29,fbuf,tcp=0.0.0.0:5900,w=800,h=600,wait \
-l bootrom,/usr/local/shared/uefi-firmware/BHYVE_UEFI.fd \
guest
Note, in BIOS emulation mode, the framebuffer will cease receiving updates once control is passed from firmware to guest operating system.
21.7.6. 在 bhyve 客端使用 ZFS
If ZFS is available on the host machine, using ZFS volumes instead of disk image files can provide significant performance benefits for the guest VMs. A ZFS volume can be created by:
# zfs create -V16G -o volmode=dev zroot/linuxdisk0When starting the VM, specify the ZFS volume as the disk drive:
# bhyve -A -H -P -s 0:0,hostbridge -s 1:0,lpc -s 2:0,virtio-net,tap0 -s3:0,virtio-blk,/dev/zvol/zroot/linuxdisk0 \
    -l com1,stdio -c 4 -m 1024M linuxguest
21.7.7. 虛擬機器 Console
It is advantageous to wrap the bhyve console in a session management tool such as sysutils/tmux or sysutils/screen in order to detach and reattach to the console. It is also possible to have the console of bhyve be a null modem device that can be accessed with cu. To do this, load the nmdm kernel module and replace -l com1,stdio with -l com1,/dev/nmdm0A. The /dev/nmdm devices are created automatically as needed, where each is a pair, corresponding to the two ends of the null modem cable (/dev/nmdm0A and /dev/nmdm0B). See nmdm(4) for more information.
# kldload nmdm
# bhyve -A -H -P -s 0:0,hostbridge -s 1:0,lpc -s 2:0,virtio-net,tap0 -s 3:0,virtio-blk,./linux.img \
    -l com1,/dev/nmdm0A -c 4 -m 1024M linuxguest
# cu -l /dev/nmdm0B
Connected

Ubuntu 13.10 handbook ttyS0

handbook login:
21.7.8. 管理虛擬機器
A device node is created in /dev/vmm for each virtual machine. This allows the administrator to easily see a list of the running virtual machines:
# ls -al /dev/vmm
total 1
dr-xr-xr-x   2 root  wheel    512 Mar 17 12:19 ./
dr-xr-xr-x  14 root  wheel    512 Mar 17 06:38 ../
crw-------   1 root  wheel  0x1a2 Mar 17 12:20 guestname
crw-------   1 root  wheel  0x19f Mar 17 12:19 linuxguest
crw-------   1 root  wheel  0x1a1 Mar 17 12:19 otherguest
A specified virtual machine can be destroyed using bhyvectl:
# bhyvectl --destroy --vm=guestname21.8. 以 FreeBSD 作為主端安裝 Xen™
Xen is a GPLv2-licensed type 1 hypervisor for Intel™ and ARM™ architectures. FreeBSD has included i386™ and AMD™ 64-Bit DomU and Amazon EC2 unprivileged domain (virtual machine) support since FreeBSD 8.0 and includes Dom0 control domain (host) support in FreeBSD 11.0. Support for para-virtualized (PV) domains has been removed from FreeBSD 11 in favor of hardware virtualized (HVM) domains, which provides better performance.
Xen™ is a bare-metal hypervisor, which means that it is the first program loaded after the BIOS. A special privileged guest called the Domain-0 (Dom0 for short) is then started. The Dom0 uses its special privileges to directly access the underlying physical hardware, making it a high-performance solution. It is able to access the disk controllers and network adapters directly. The Xen™ management tools to manage and control the Xen™ hypervisor are also used by the Dom0 to create, list, and destroy VMs. Dom0 provides virtual disks and networking for unprivileged domains, often called DomU. Xen™ Dom0 can be compared to the service console of other hypervisor solutions, while the DomU is where individual guest VMs are run.
Xen™ can migrate VMs between different Xen™ servers. When the two xen hosts share the same underlying storage, the migration can be done without having to shut the VM down first. Instead, the migration is performed live while the DomU is running and there is no need to restart it or plan a downtime. This is useful in maintenance scenarios or upgrade windows to ensure that the services provided by the DomU are still provided. Many more features of Xen™ are listed on the Xen Wiki Overview page. Note that not all features are supported on FreeBSD yet.
21.8.1. Xen™ Dom0 的硬體需求
To run the Xen™ hypervisor on a host, certain hardware functionality is required. Hardware virtualized domains require Extended Page Table (EPT) and Input/Output Memory Management Unit (IOMMU) support in the host processor.
In order to run a FreeBSD Xen™ Dom0 the box must be booted using legacy boot (BIOS). |
21.8.2. Xen™ Dom0 控制領域安裝
Users of FreeBSD 11 should install the emulators/xen-kernel47 and sysutils/xen-tools47 packages that are based on Xen version 4.7. Systems running on FreeBSD-12.0 or newer can use Xen 4.11 provided by emulators/xen-kernel411 and sysutils/xen-tools411, respectively.
Configuration files must be edited to prepare the host for the Dom0 integration after the Xen packages are installed. An entry to /etc/sysctl.conf disables the limit on how many pages of memory are allowed to be wired. Otherwise, DomU VMs with higher memory requirements will not run.
# echo 'vm.max_wired=-1' >> /etc/sysctl.confAnother memory-related setting involves changing /etc/login.conf, setting the memorylocked option to unlimited. Otherwise, creating DomU domains may fail with Cannot allocate memory errors. After making the change to /etc/login.conf, run cap_mkdb to update the capability database. See 限制資源 for details.
# sed -i '' -e 's/memorylocked=64K/memorylocked=unlimited/' /etc/login.conf
# cap_mkdb /etc/login.conf
Add an entry for the Xen™ console to /etc/ttys:
# echo 'xc0 "/usr/libexec/getty Pc" xterm onifconsole secure' >> /etc/ttysSelecting a Xen™ kernel in /boot/loader.conf activates the Dom0. Xen™ also requires resources like CPU and memory from the host machine for itself and other DomU domains. How much CPU and memory depends on the individual requirements and hardware capabilities. In this example, 8 GB of memory and 4 virtual CPUs are made available for the Dom0. The serial console is also activated and logging options are defined.
The following command is used for Xen 4.7 packages:
# sysrc -f /boot/loader.conf hw.pci.mcfg=0
# sysrc -f /boot/loader.conf if_tap_load="YES"
# sysrc -f /boot/loader.conf xen_kernel="/boot/xen"
# sysrc -f /boot/loader.conf xen_cmdline="dom0_mem=8192M dom0_max_vcpus=4 dom0pvh=1 console=com1,vga com1=115200,8n1 guest_loglvl=all loglvl=all"
For Xen versions 4.11 and higher, the following command should be used instead:
# sysrc -f /boot/loader.conf if_tap_load="YES"
# sysrc -f /boot/loader.conf xen_kernel="/boot/xen"
# sysrc -f /boot/loader.conf xen_cmdline="dom0_mem=8192M dom0_max_vcpus=4 dom0=pvh console=com1,vga com1=115200,8n1 guest_loglvl=all loglvl=all"
Log files that Xen™ creates for the DomU VMs are stored in /var/log/xen. Please be sure to check the contents of that directory if experiencing issues. |
Activate the xencommons service during system startup:
# sysrc xencommons_enable=yesThese settings are enough to start a Dom0-enabled system. However, it lacks network functionality for the DomU machines. To fix that, define a bridged interface with the main NIC of the system which the DomU VMs can use to connect to the network. Replace em0 with the host network interface name.
# sysrc cloned_interfaces="bridge0"
# sysrc ifconfig_bridge0="addm em0 SYNCDHCP"
# sysrc ifconfig_em0="up"
Restart the host to load the Xen™ kernel and start the Dom0.
# rebootAfter successfully booting the Xen™ kernel and logging into the system again, the Xen™ management tool xl is used to show information about the domains.
# xl list
Name                                        ID   Mem VCPUs      State   Time(s)
Domain-0                                     0  8192     4     r-----     962.0
The output confirms that the Dom0 (called Domain-0) has the ID 0 and is running. It also has the memory and virtual CPUs that were defined in /boot/loader.conf earlier. More information can be found in the Xen Documentation. DomU guest VMs can now be created.
21.8.3. Xen™ DomU 客端 VM 設置
Unprivileged domains consist of a configuration file and virtual or physical hard disks. Virtual disk storage for the DomU can be files created by truncate(1) or ZFS volumes as described in 建立與摧毀磁碟區. In this example, a 20 GB volume is used. A VM is created with the ZFS volume, a FreeBSD ISO image, 1 GB of RAM and two virtual CPUs. The ISO installation file is retrieved with fetch(1) and saved locally in a file called freebsd.iso.
# fetch ftp://ftp.freebsd.org/pub/FreeBSD/releases/ISO-IMAGES/12.0/FreeBSD-12.0-RELEASE-amd64-bootonly.iso -o freebsd.isoA ZFS volume of 20 GB called xendisk0 is created to serve as the disk space for the VM.
# zfs create -V20G -o volmode=dev zroot/xendisk0The new DomU guest VM is defined in a file. Some specific definitions like name, keymap, and VNC connection details are also defined. The following freebsd.cfg contains a minimum DomU configuration for this example:
# cat freebsd.cfg
builder = "hvm" (1)
name = "freebsd" (2)
memory = 1024 (3)
vcpus = 2 (4)
vif = [ 'mac=00:16:3E:74:34:32,bridge=bridge0' ] (5)
disk = [
'/dev/zvol/tank/xendisk0,raw,hda,rw', (6)
'/root/freebsd.iso,raw,hdc:cdrom,r' (7)
  ]
vnc = 1 (8)
vnclisten = "0.0.0.0"
serial = "pty"
usbdevice = "tablet"
These lines are explained in more detail:
| 1 | This defines what kind of virtualization to use. hvm refers to hardware-assisted virtualization or hardware virtual machine. Guest operating systems can run unmodified on CPUs with virtualization extensions, providing nearly the same performance as running on physical hardware. generic is the default value and creates a PV domain. |
| 2 | Name of this virtual machine to distinguish it from others running on the same Dom0. Required. |
| 3 | Quantity of RAM in megabytes to make available to the VM. This amount is subtracted from the hypervisor’s total available memory, not the memory of the Dom0. |
| 4 | Number of virtual CPUs available to the guest VM. For best performance, do not create guests with more virtual CPUs than the number of physical CPUs on the host. |
| 5 | Virtual network adapter. This is the bridge connected to the network interface of the host. The mac parameter is the MAC address set on the virtual network interface. This parameter is optional, if no MAC is provided Xen™ will generate a random one. |
| 6 | Full path to the disk, file, or ZFS volume of the disk storage for this VM. Options and multiple disk definitions are separated by commas. |
| 7 | Defines the Boot medium from which the initial operating system is installed. In this example, it is the ISO imaged downloaded earlier. Consult the Xen™ documentation for other kinds of devices and options to set. |
| 8 | Options controlling VNC connectivity to the serial console of the DomU. In order, these are: active VNC support, define IP address on which to listen, device node for the serial console, and the input method for precise positioning of the mouse and other input methods. keymap defines which keymap to use, and is english by default. |
After the file has been created with all the necessary options, the DomU is created by passing it to xl create as a parameter.
# xl create freebsd.cfgEach time the Dom0 is restarted, the configuration file must be passed to |
The output of xl list confirms that the DomU has been created.
# xl list
Name                                        ID   Mem VCPUs      State   Time(s)
Domain-0                                     0  8192     4     r-----  1653.4
freebsd                                      1  1024     1     -b----   663.9
To begin the installation of the base operating system, start the VNC client, directing it to the main network address of the host or to the IP address defined on the vnclisten line of freebsd.cfg. After the operating system has been installed, shut down the DomU and disconnect the VNC viewer. Edit freebsd.cfg, removing the line with the cdrom definition or commenting it out by inserting a # character at the beginning of the line. To load this new configuration, it is necessary to remove the old DomU with xl destroy, passing either the name or the id as the parameter. Afterwards, recreate it using the modified freebsd.cfg.
# xl destroy freebsd
# xl create freebsd.cfg
The machine can then be accessed again using the VNC viewer. This time, it will boot from the virtual disk where the operating system has been installed and can be used as a virtual machine.
21.8.4. 疑難排解
This section contains basic information in order to help troubleshoot issues found when using FreeBSD as a Xen™ host or guest.
21.8.4.1. 主端開機疑難排解
Please note that the following troubleshooting tips are intended for Xen™ 4.11 or newer. If you are still using Xen™ 4.7 and having issues consider migrating to a newer version of Xen™.
In order to troubleshoot host boot issues you will likely need a serial cable, or a debug USB cable. Verbose Xen™ boot output can be obtained by adding options to the xen_cmdline option found in loader.conf. A couple of relevant debug options are:
iommu=debug: can be used to print additional diagnostic information about the iommu.dom0=verbose: can be used to print additional diagnostic information about the dom0 build process.sync_console: flag to force synchronous console output. Useful for debugging to avoid losing messages due to rate limiting. Never use this option in production environments since it can allow malicious guests to perform DoS attacks against Xen™ using the console.
FreeBSD should also be booted in verbose mode in order to identify any issues. To activate verbose booting, run this command:
# sysrc -f /boot/loader.conf boot_verbose="YES"If none of these options help solving the problem, please send the serial boot log to freebsd-xen@FreeBSD.org and xen-devel@lists.xenproject.org for further analysis.
21.8.4.2. 客端建立疑難排解
Issues can also arise when creating guests, the following attempts to provide some help for those trying to diagnose guest creation issues.
The most common cause of guest creation failures is the xl command spitting some error and exiting with a return code different than 0. If the error provided is not enough to help identify the issue, more verbose output can also be obtained from xl by using the v option repeatedly.
# xl -vvv create freebsd.cfg
Parsing config from freebsd.cfg
libxl: debug: libxl_create.c:1693:do_domain_create: Domain 0:ao 0x800d750a0: create: how=0x0 callback=0x0 poller=0x800d6f0f0
libxl: debug: libxl_device.c:397:libxl__device_disk_set_backend: Disk vdev=xvda spec.backend=unknown
libxl: debug: libxl_device.c:432:libxl__device_disk_set_backend: Disk vdev=xvda, using backend phy
libxl: debug: libxl_create.c:1018:initiate_domain_create: Domain 1:running bootloader
libxl: debug: libxl_bootloader.c:328:libxl__bootloader_run: Domain 1:not a PV/PVH domain, skipping bootloader
libxl: debug: libxl_event.c:689:libxl__ev_xswatch_deregister: watch w=0x800d96b98: deregister unregistered
domainbuilder: detail: xc_dom_allocate: cmdline="", features=""
domainbuilder: detail: xc_dom_kernel_file: filename="/usr/local/lib/xen/boot/hvmloader"
domainbuilder: detail: xc_dom_malloc_filemap    : 326 kB
libxl: debug: libxl_dom.c:988:libxl__load_hvm_firmware_module: Loading BIOS: /usr/local/shared/seabios/bios.bin
...
If the verbose output does not help diagnose the issue there are also QEMU and Xen™ toolstack logs in /var/log/xen. Note that the name of the domain is appended to the log name, so if the domain is named freebsd you should find a /var/log/xen/xl-freebsd.log and likely a /var/log/xen/qemu-dm-freebsd.log. Both log files can contain useful information for debugging. If none of this helps solve the issue, please send the description of the issue you are facing and as much information as possible to freebsd-xen@FreeBSD.org and xen-devel@lists.xenproject.org in order to get help.
最後修改於: June 18, 2026 由 Alexander Ziaee